

Thursday, July 29, 2010

Swaddle Blanket Pattern
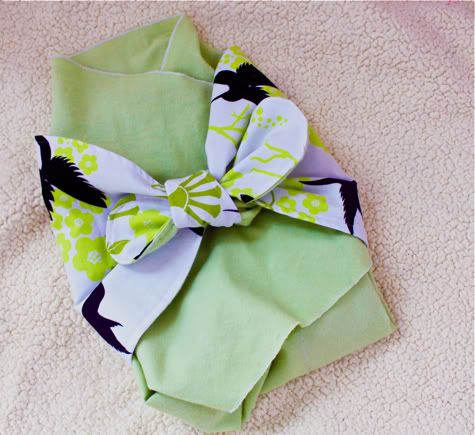
OK ladies, I am super proud of this DIY Swaddle Blanket so be nice (I know you're always nice, but please be extra nice). This gift is destined for a baby yet-to-be-born so it's modeled here by my other child, Scarlet's sister, Pandy. It's okay, you can laugh at Pandy's forlorn, distant stare. Just don't laugh at my attempt to show you how to make a swaddle blanket.
There are so few free tutorials on how to make a swaddling blanket and so many expensive versions on the market, so I've been feeling them all out and trying to come up with a simple, yet effective, way to make your own. This free swaddling blanket tutorial will cost you under $5 to make with inexpensive flannel. It can be sewn in about an hour or two depending on your sewing style. Here's a little step-by-step on how this homemade swaddling blanket works. It can be tucked or tied. Don't worry, it works the same for pandas and babies.
Tell me what you think in the comments, please!!! And get the Free Swaddle Blanket Pattern after the jump...
How to Make A Swaddle Blanket
Free Swaddle Blanket Pattern
***I've made an updated version of this tutorial. Check it out here: New & Improved DIY Swaddle Blanket Pattern
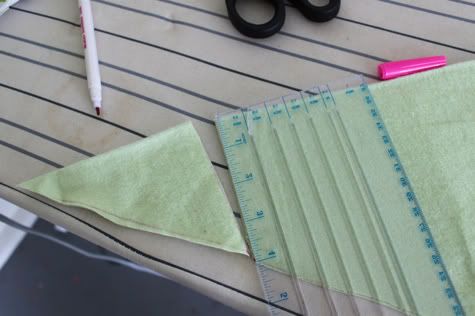
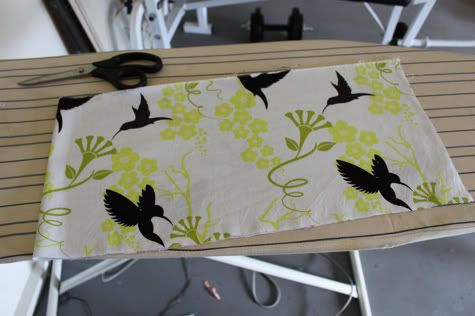
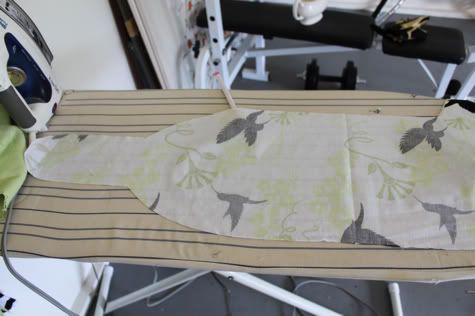
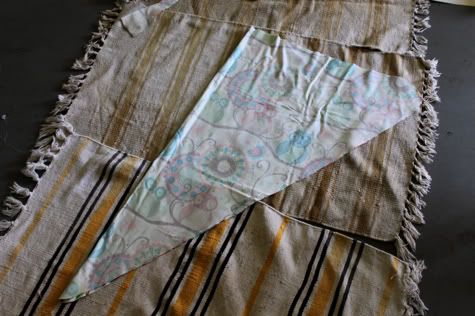
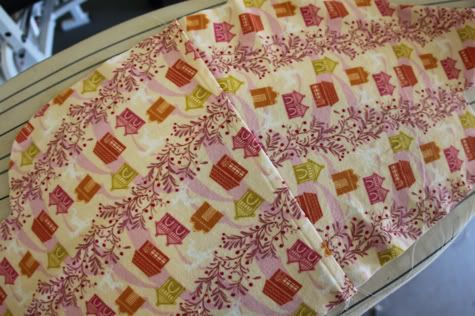
1. You'll need 1 yard of flannel (you can use another fabric but i personally found that the non-stretch quality of flannel was ideal for swaddling) and a 1/4 yard of a cute cotton print (I used Patty Young Flora & Fauna Hummingbirds in White). Fold the flannel in half along the width (around 45" for most fabric yardage) on the diagonal and draw a 40" line from the outside corner to the fold to create a triangle like so:

Cut along that line.
2. Leave your triangle folded and draw a 4" line horizontally across the tip and cut the tip off like so:
Here's a little diagram to make it more clear:
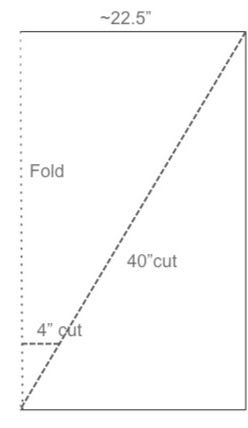
***Update: I've heard from some test moms that tall babies can kick their way out and the blanket would be better a little longer. So you may want to just make a 2" cut or no cut at all to leave a little extra length.
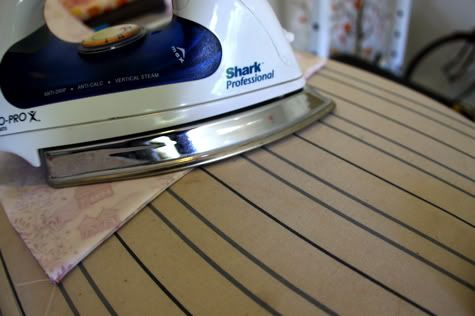
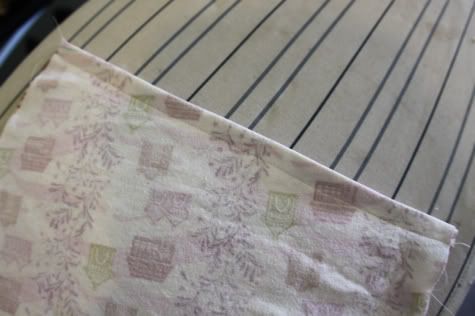
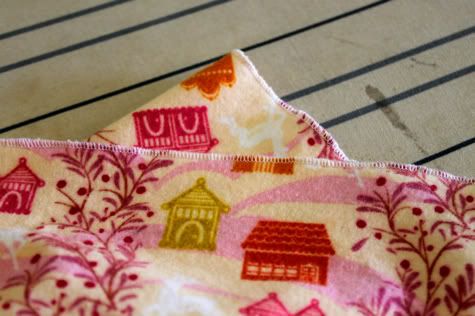
3. Now at this point I serged a rolled hem all the way around my triangle blanket, but if you don't have a serger I'll give you other options after the picture. If you want to understand a serger check out my video "What is A Serger? What Does A Serger Do?" here:
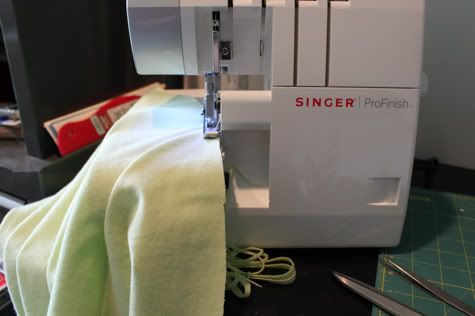
You can fold 1/8" and iron all the way around, then another 1/8" inch, iron, pin and sew a hem, or if you want, you can cut another triangle of the same size (in the same or coordinating fabric), sew the two triangles together with right sides facing leaving a turning hole, then turn them inside out, iron flat, and top-stitch around the edge.
Here is my completed rolled hem:
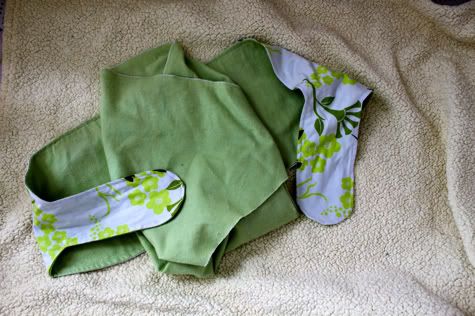
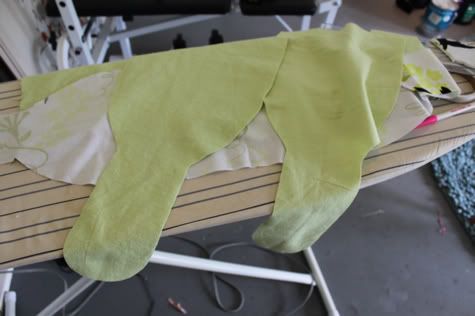
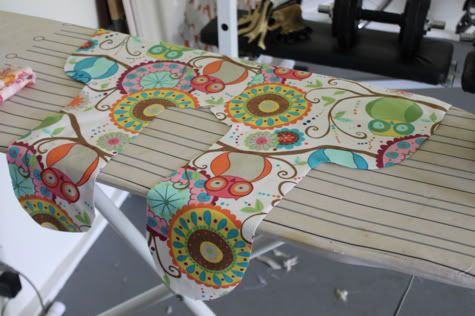
4. Now set your swaddle blanket aside and let's create the wrap. Cut a piece of fabric the length of your yard (44"-45") and 10" wide. Fold it in half lengthwise:
the again widththwise so it's quartered, then draw your tie shape onto it starting at the fold. I freehanded it but you can trace something round for the curves and use a ruler for the straight edges. See this picture for guidance:

Cut that out. This is what it will look like unfolded:
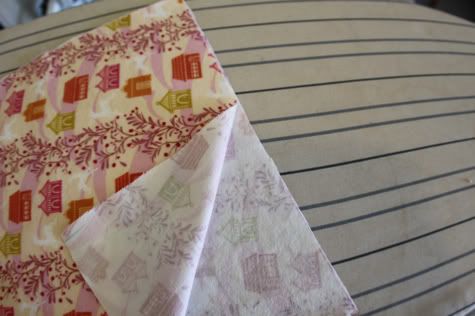
5. So you need a piece of flannel the same size, but if you only bought one yard of flannel (or to get the most out of the yard you already cut into a triangle) you should cut two pieces. Trace the shape of your cotton tie piece onto your flannel and cut two identical pieces, each representing half of your tie:
6. Lay your cotton tie piece right side up, and your two flannel pieces right side down on top with the middle edges lining up, like so:
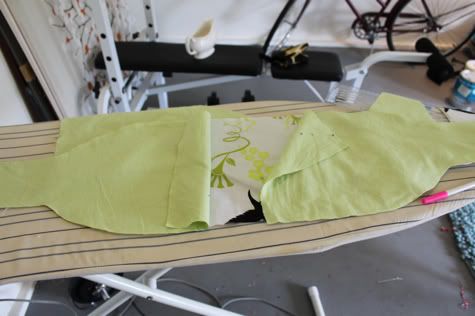
Pin around the edges:
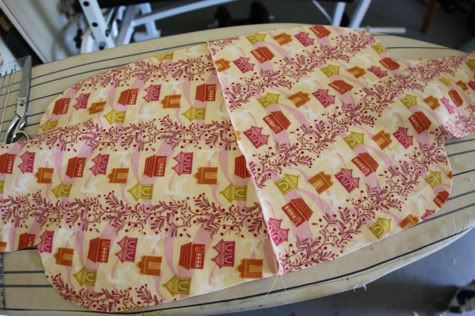
Then sew in place. Trim the seam allowance and cut little notches at the corners:

7. Turn the whole thing right side out through the space between your two flannel pieces. Push out the edges and iron it flat:
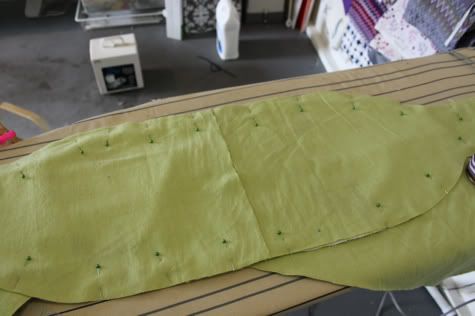
When it's right side out, cut a piece of fusible tape and iron it between the cotton and the flannel along the cut edges of the flannel:
Then top stitch 1/4" from the edge all the way around:
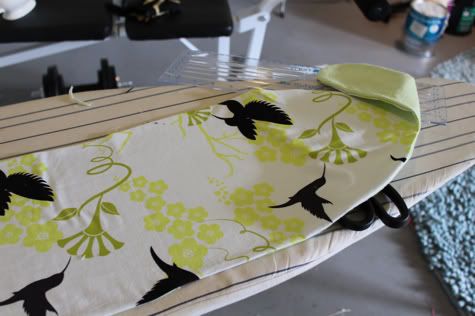
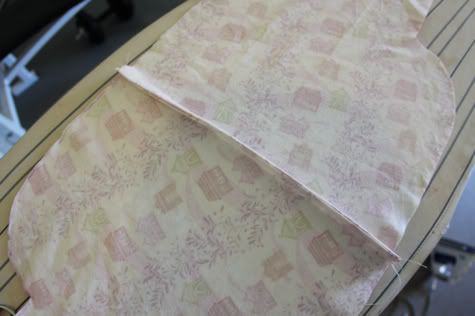
8. Now grab your blanket you made earlier. Fold the triangle in half down the center and iron a nice sharp line into it:

Unfold it so your ironed edge is up.
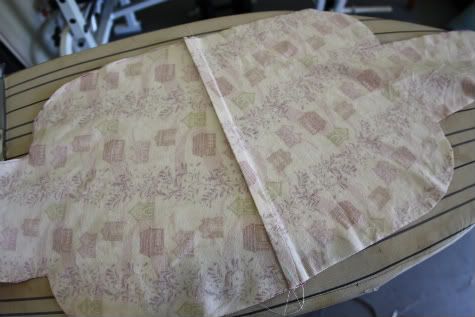
Take your tie piece and fold it in half with the cotton pattern to the inside and the flannel outside and line it up with the ironed edge of the blanket abut 3 inches down from the top (the widest side is the top):
Carefully pin the center of the tie to the center line of the blanket:
Now you want to sew that in place. Because you will see the sewn line on all sides, and you want to be sure to catch both edges of the flannel, I used a decorative leaf stitch my sewing machine has, but you don't have to, you can use a zig zag. The fusible tape we added earlier ensures we have everything in place:
Here is how it looks from the inside:
YOU ARE DONE MY FRIEND!
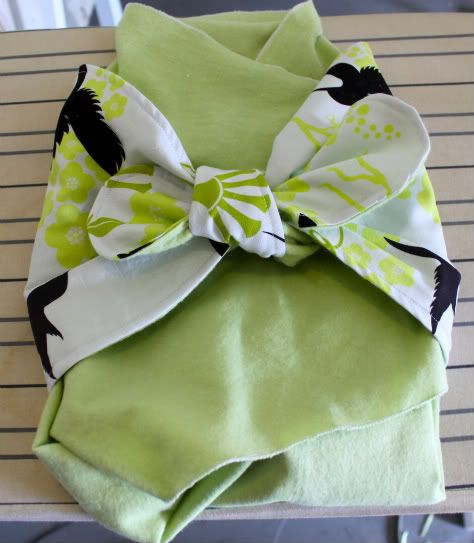
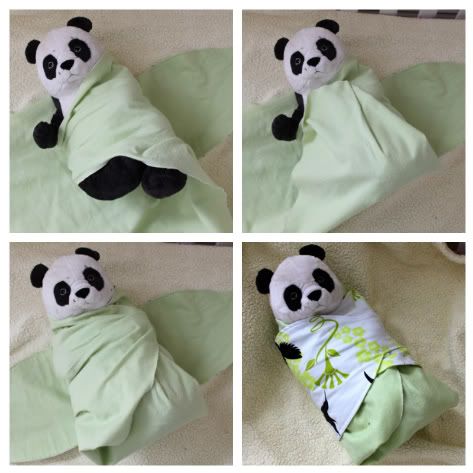
Wrap that baby up:
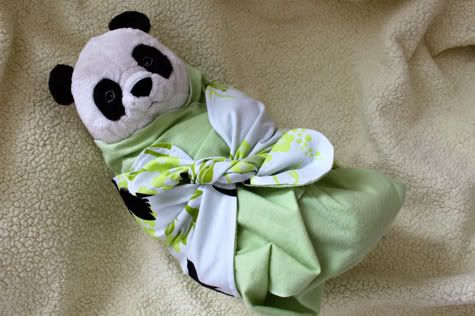
Poor forlorn Pandy...

New & Improved DIY Swaddle Blanket
OK ladies, I am super proud of this DIY Swaddle Blanket so be nice (I know you're always nice, but please be extra nice). This gift is destined for a baby yet-to-be-born so it's modeled here by my other child, Scarlet's sister, Pandy. It's okay, you can laugh at Pandy's forlorn, distant stare. Just don't laugh at my attempt to show you how to make a swaddle blanket.
There are so few free tutorials on how to make a swaddling blanket and so many expensive versions on the market, so I've been feeling them all out and trying to come up with a simple, yet effective, way to make your own. This free swaddling blanket tutorial will cost you under $5 to make with inexpensive flannel. It can be sewn in about an hour or two depending on your sewing style. Here's a little step-by-step on how this homemade swaddling blanket works. It can be tucked or tied. Don't worry, it works the same for pandas and babies.
Tell me what you think in the comments, please!!! And get the Free Swaddle Blanket Pattern after the jump...
How to Make A Swaddle Blanket
Free Swaddle Blanket Pattern
***I've made an updated version of this tutorial. Check it out here: New & Improved DIY Swaddle Blanket Pattern
1. You'll need 1 yard of flannel (you can use another fabric but i personally found that the non-stretch quality of flannel was ideal for swaddling) and a 1/4 yard of a cute cotton print (I used Patty Young Flora & Fauna Hummingbirds in White). Fold the flannel in half along the width (around 45" for most fabric yardage) on the diagonal and draw a 40" line from the outside corner to the fold to create a triangle like so:
Cut along that line.
2. Leave your triangle folded and draw a 4" line horizontally across the tip and cut the tip off like so:
Here's a little diagram to make it more clear:
***Update: I've heard from some test moms that tall babies can kick their way out and the blanket would be better a little longer. So you may want to just make a 2" cut or no cut at all to leave a little extra length.
3. Now at this point I serged a rolled hem all the way around my triangle blanket, but if you don't have a serger I'll give you other options after the picture. If you want to understand a serger check out my video "What is A Serger? What Does A Serger Do?" here:
You can fold 1/8" and iron all the way around, then another 1/8" inch, iron, pin and sew a hem, or if you want, you can cut another triangle of the same size (in the same or coordinating fabric), sew the two triangles together with right sides facing leaving a turning hole, then turn them inside out, iron flat, and top-stitch around the edge.
Here is my completed rolled hem:
4. Now set your swaddle blanket aside and let's create the wrap. Cut a piece of fabric the length of your yard (44"-45") and 10" wide. Fold it in half lengthwise:
the again widththwise so it's quartered, then draw your tie shape onto it starting at the fold. I freehanded it but you can trace something round for the curves and use a ruler for the straight edges. See this picture for guidance:
Cut that out. This is what it will look like unfolded:
5. So you need a piece of flannel the same size, but if you only bought one yard of flannel (or to get the most out of the yard you already cut into a triangle) you should cut two pieces. Trace the shape of your cotton tie piece onto your flannel and cut two identical pieces, each representing half of your tie:
6. Lay your cotton tie piece right side up, and your two flannel pieces right side down on top with the middle edges lining up, like so:
Pin around the edges:
Then sew in place. Trim the seam allowance and cut little notches at the corners:
7. Turn the whole thing right side out through the space between your two flannel pieces. Push out the edges and iron it flat:
When it's right side out, cut a piece of fusible tape and iron it between the cotton and the flannel along the cut edges of the flannel:
Then top stitch 1/4" from the edge all the way around:
8. Now grab your blanket you made earlier. Fold the triangle in half down the center and iron a nice sharp line into it:
Unfold it so your ironed edge is up.
Take your tie piece and fold it in half with the cotton pattern to the inside and the flannel outside and line it up with the ironed edge of the blanket abut 3 inches down from the top (the widest side is the top):
Carefully pin the center of the tie to the center line of the blanket:
Now you want to sew that in place. Because you will see the sewn line on all sides, and you want to be sure to catch both edges of the flannel, I used a decorative leaf stitch my sewing machine has, but you don't have to, you can use a zig zag. The fusible tape we added earlier ensures we have everything in place:
Here is how it looks from the inside:
YOU ARE DONE MY FRIEND!
Wrap that baby up:
Poor forlorn Pandy...
Ladies, we had so much fun with the first DIY Swaddle Blanket, right? But everything can be improved with a little user feedback. So I gave one to my friend Rebecca and her new baby girl, and she gave me some useful tips on how to improve it for even better swaddling-action. What I heard was that baby could kick out of it just a little too easily, so we made it longer. Then I also heard it needed more "tuckability" so I made an adjustment for that. The final thing I did was to make it all out of flannel and create a finished edge that doesn't require a serger, for all you sergerless sewers out there.
Take a look and let us know what you think. Get the full DIY on How to Sew a Swaddle Blanket after the jump...
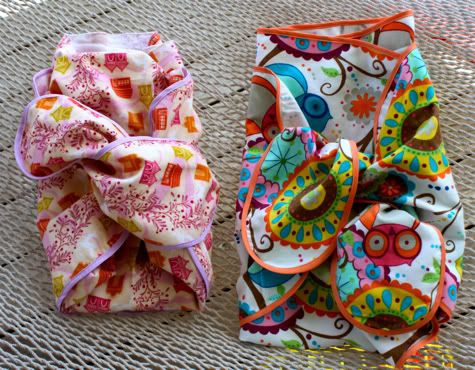
New & Improved Swaddle Blanket Pattern
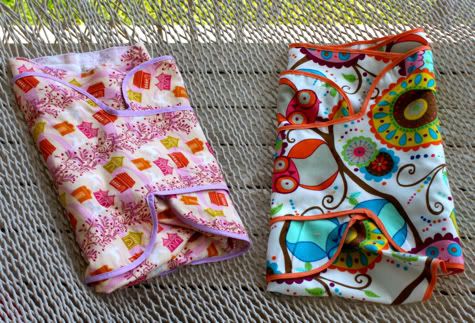
The pink one is made with Anna Maria Horner Folksy Flannels Forest Hills in Glowand the bright one is Valori Wells Della Flannel in Multi.
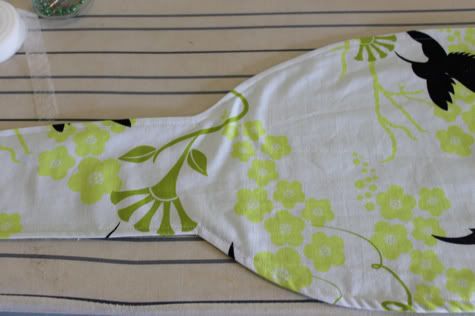
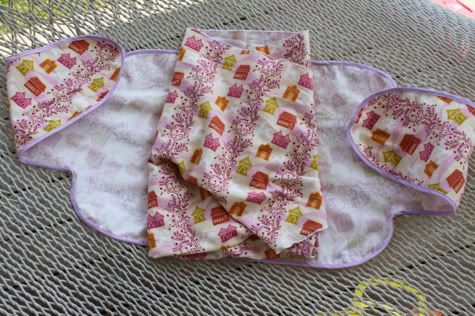
1. You'll need one yard of flannel or some other soft non-stretch fabric, like a muslin gauze. Fold the flannel in half along the width, so it's as long as possible and cut a triangle out of it as pictured (on my disgusting floor, don't judge me, it's my garage). In the previous DIY I said to cut off some of the tip of the triangle, but I've changed my mind, don't be mad. Round the corners and the tip of the triangle when you cut, so you've got a piece like this:
2. Now you want to use the two leftover bits of flannel you have to cut two shapes like this:
You can do that by folding your piece of fabric in half lengthwise:
the again widththwise so it's quartered, then draw your tie shape onto it starting at the fold. I freehanded it but you can trace something round for the curves and use a ruler for the straight edges. See this picture for guidance:
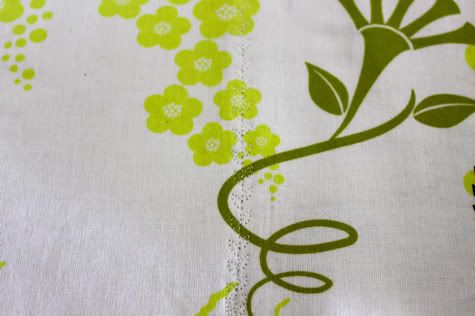
3. Now we want to sew those two pieces together with a french seam. Here's how you do that. Take the two flat ends and line them up WRONG SIDES FACING (this seems counter intuitive but it's correct):
Sew them together along the flat edge with a straight stitch then open up your piece. It will look like this:
Now turn the pieces so they are right sides facing and your seam is in the middle. Iron it flat:
Now sew with a 5/8" seam allowance like so:
Open it up again and it will look like this:
Fold your seam to one side and iron it down:
Then sew the flap down with a straight stitch. It will look like this from the right side:
Yay you made a french seam! So easy! Ok, moving on...
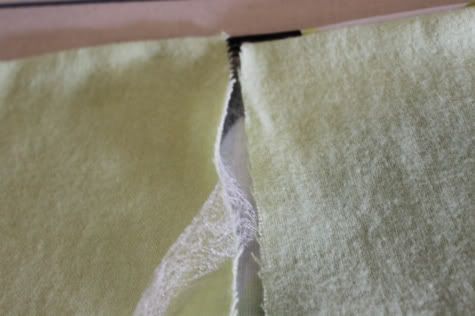
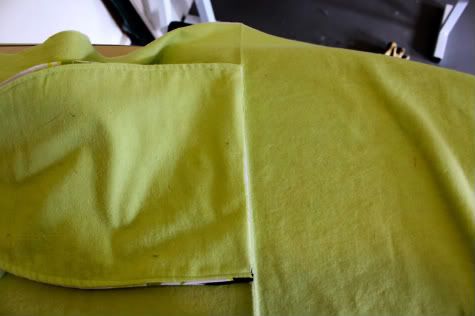
4. Now we want to finish the edges of our blanket and our tie. You can serge all the edges, but not everyone has a serger and honestly it just doesn't look as cute:
So instead, grab some double fold bias tape, the skinniest kind you can buy. You need one 4 yard package for the blanket and one for the tie. Check which side is slightly longer than the other. Unfold and pin the edge of that side to the wrong side of your tie all the way around:
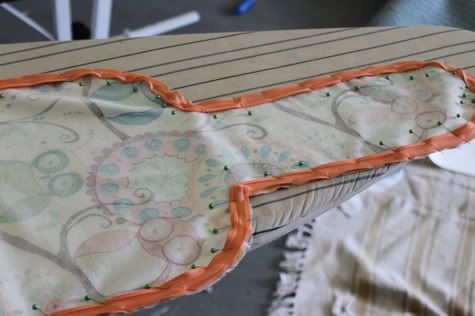
Sew in place along the fold with a straight stitch:
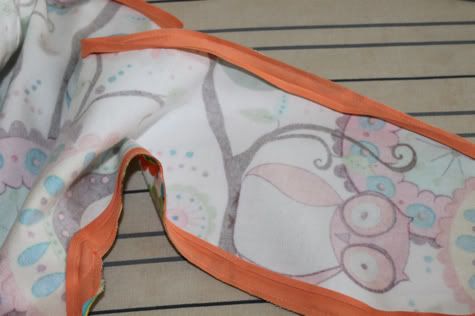
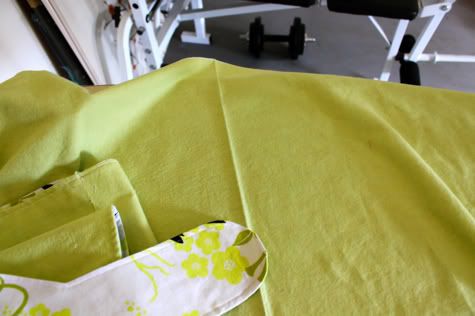
Fold the bias tape back up and flip it over to the right side of your piece, iron, pin and sew it in place all the way around:

Do this to the blanket and the tie piece.
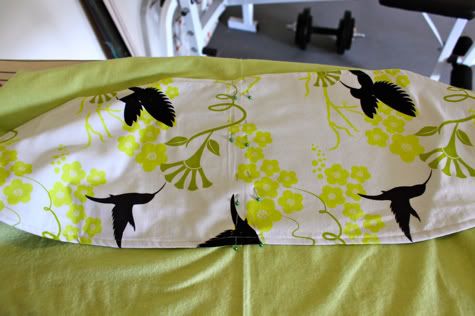
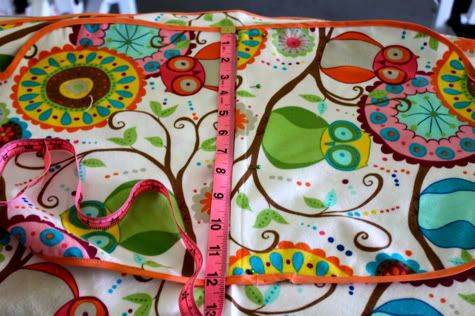
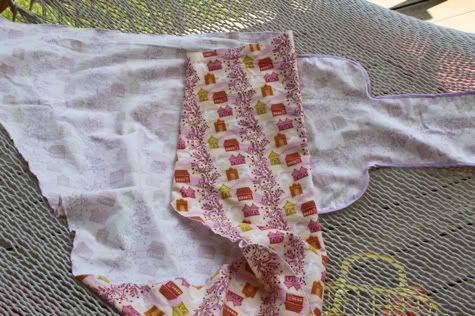
5. Now fold your triangle blanket in half and iron a nice sharp crease into it. Unfold it and use the crease as your guide to where the center of the blanket is. Align the center of your tie piece with the center of the blanket, about 3 inches down from the top, and pin in place. Lay a ruler or measuring tape along the seam of the tie piece. mark with a pin 3.5" down and 7.5" down. You are marking where you are going to sew the tie to the blanket. In this new and imporved version of our DIY swaddle blanket we are leaving a hole for tucking by NOT sewing between those two marks. Check this picture to see how it's done:
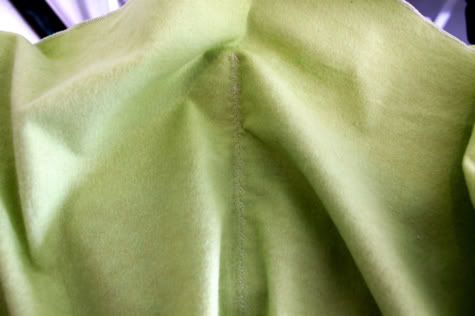
6. Now sew from the top center of the tie down to your first pin. Since you can see this stitch on all sides, and we want it to be a strong one, I used a decorative stitch my sewing machines comes with, but you can just use a zig zag if you like. Then cut your threads and sew again from the second pin down to the bottom. So it will look like this:
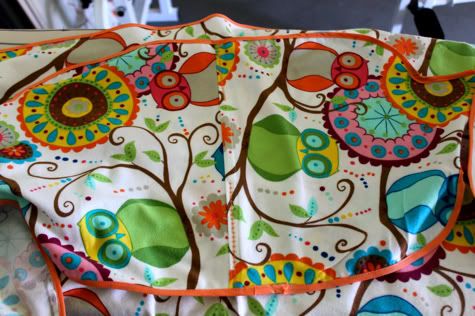
It's actually easier to see from the inside so here's another view:
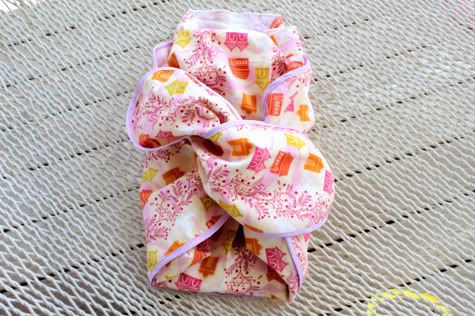
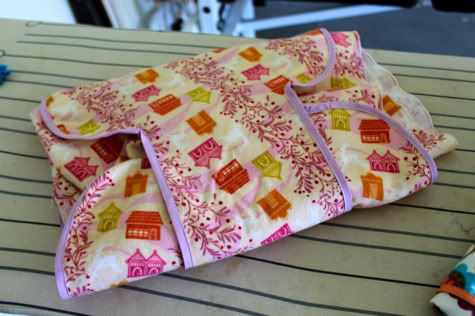
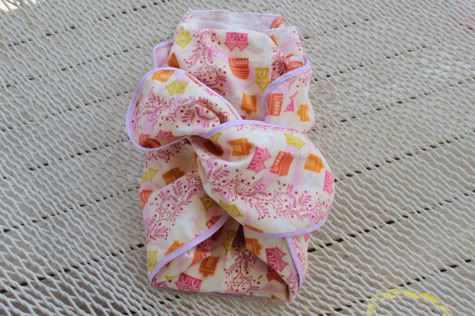
GIRL YOU ARE DONE!
Now fold that baby up. Start by spreading it all out, then bring the right side over baby and tuck under:
Then lift the bottom up and tuck into the top or behind baby's shoulders:

Then wrap the left side around baby, tucking the excess fabric through the hole we made:
Then tuck:
or tie:
Subscribe to:
Posts (Atom)