Monday, November 29, 2010

Santa Letters

*The Idea room

Photobucket

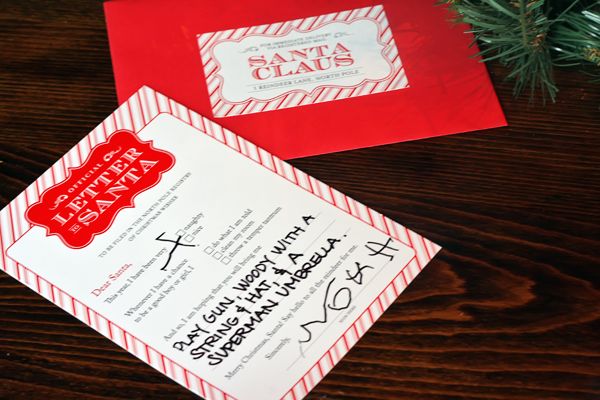
Have you seen the fun deal at GroopDealz today? I want these! Aren't they cute?

Photobucket

$9 Letters to Santa Kit - Set of 4 cards, 4 envelopes & 4 labels - Free shipping to U.S. ($18 Value)

Photobucket

This is a great deal and is available to anyone no matter where you live. So go and check it out at GroopDealz.

Photobucket

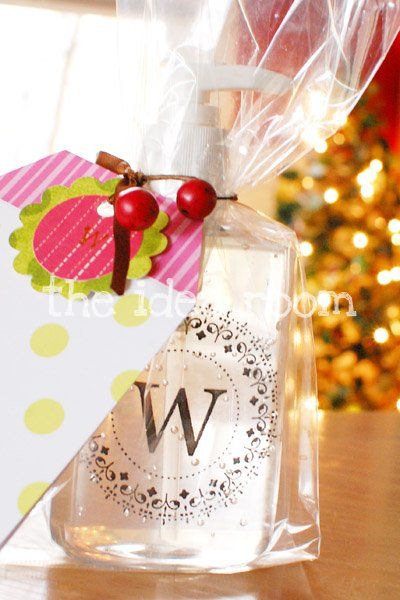
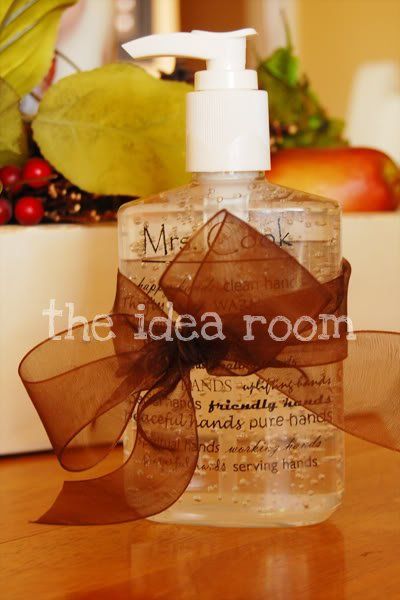
Monogrammed Hand Sanitizer/ Soap Bottles

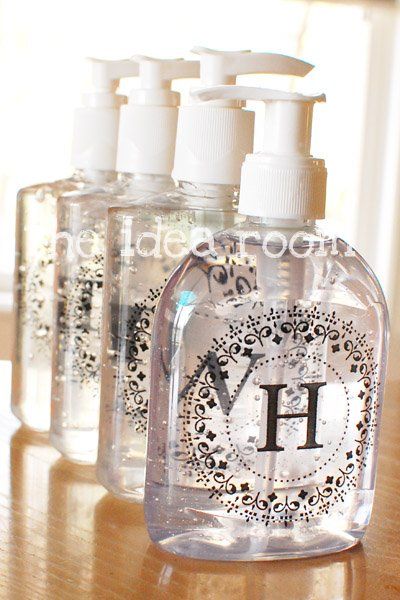
I'd like to welcome all my newest Followers! CrAzY! I hope you stick around and enjoy what you see here at The Idea Room. Today I would like to share with you a fun, easy and inexpensive gift that is perfect for teachers, neighbors and friends...Monogrammed Hand Soap and/or Sanitizers.

Photobucket

All you need are a few simple items:

A bottle of hand soap or hand sanitizer
A sheet of overhead transparency
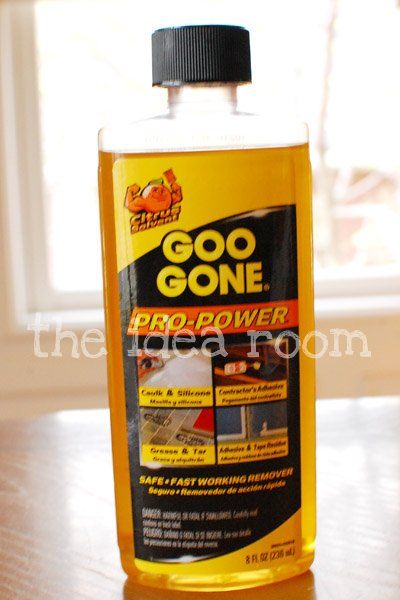
goo gone (to remove labels)

Photobucket

I usually buy my bottles of soap and hand sanitizer from the Dollar Store. {Or you can buy empty bottles and fill with soap and sanitizer}. Then I remove all the stickers and labels from the bottles. I got my paper labels wet and they easily scraped off. To clean off any glue residue, I used Goo Gone which I purchased at Home Depot.

Photobucket

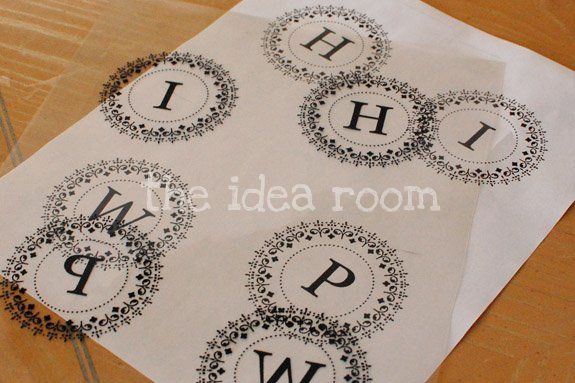
**Download the free monogram label here.

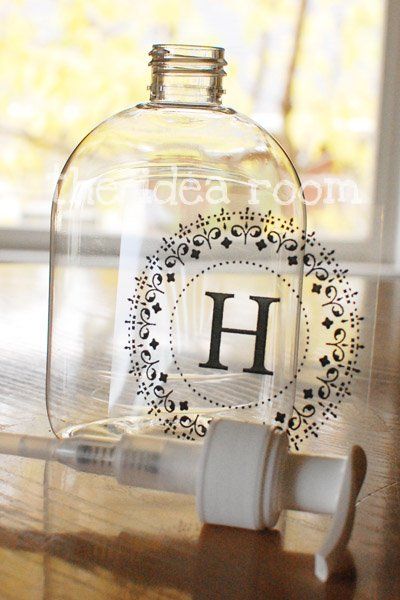
**You will have to save it to your computer and then open it up with your Word program, photo program or insert it into a blank Word document. Then you should be able to send the image to the background and then type over the image to add the letter you need.

Measure the width of your bottle. In your word program edit the monogram and size it to the proper size for your bottles. Add the letter you need in the center. Then print out the monogram. If your printer is a laser printer, you can print the monogram right onto your overhead transparency paper. If you don't have a laser printer, print the monogram onto a regular piece of paper. Then copy the monogram onto the overhead transparency with a copy machine. Most Copy Centers will be able to do this for you.

Photobucket

**The above step is very important. If you don't print it with laser printer or copier, the lettering will fall off your vinyl and float in the sanitizer or soap...which doesn't make for a pretty present!

**You can always forgo the above step and just cut out some vinyl in the monogram and place it on the front of your bottle too.

Cut around your printed label as straight and as close as you can get to the writing so that it fits properly into your bottle. Check before you cut the bottom of the label to be sure that it will sit as high in the bottle as you would like it to.

Photobucket

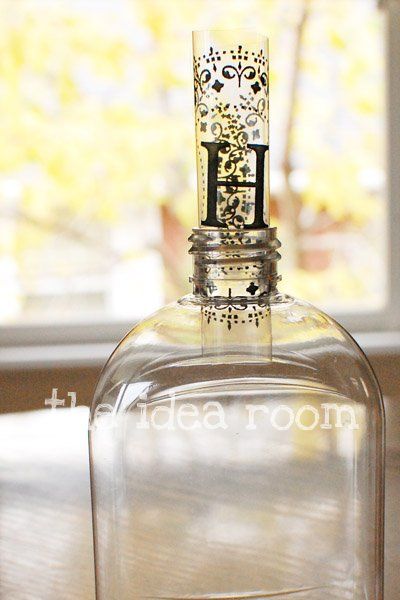
Roll up the label so that the writing is in front. I roll mine backwards. Stuff it into the top of the bottle carefully.

Photobucket

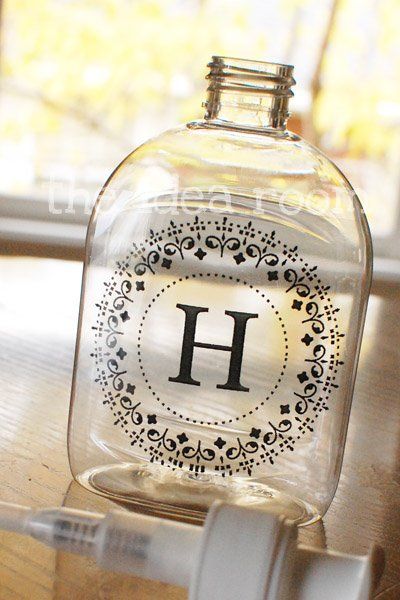
Use the soap dispenser to push the label to the front wall of the bottle and to straighten it in the right position.

Photobucket

The best part of these is that they are so afforable and practical. They are also completely customizable. You could really put anything on the transparency and they could be used for so many things...birthdays, home decor, for new parents and their frequent guests, etc. Here is a version I made two years ago for one of my child's teachers.

Photobucket

**For the "hand in hand" download, click here.

Happy gift-giving!

If you have a favorite Christmas project, feel free to link it up here. *Please remember to include my button (or a text link) below your post! From this link up I would love to find and feature a few of your Christmas ideas on my blog in the coming weeks. Thank You!

*I reserve the right to remove any link for any reason! Then remember to leave others some link love in the form of comments on their link ups! We all love comments right?

Wednesday, November 17, 2010

christmas felting

To make this cheer-inducing winter scene, you will need:

1. 1 9-inch wooden embroidery hoop
2. a piece of cotton or linen about 12" square
3. wool felt (or craft felt) in white, pink, brown, red, yellow, green, and turquoise (or the colors of your choice)
4. coordinating thread colors
5. embroidery floss in brown and turquoise
6. sharp scissors
7. pinking sheers
8. glue
9. a few straight pins

Stretch your background fabric (I've used this polka-dotted robin's egg blue cotton for a clever snow effect, but you can use whatever you like!) on your hoop, tightening and pulling gently until you achieve a nice, tight, drum-like effect.
Print and cut the templates and pin to appropriate felt colors (or trace around the template for teensy bits). Cut all your pieces, and arrange tree, house, roof, and snow bank without pinning in order to determine the appropriate position for tree and house.
Pin the tree and the house, and attach with a small, neat running stitch.
Pin the snow bank in place, overlapping the bottom of the tree and the house, and attach with a small, neat running stitch.
Attach the roof top with a running stitch. Use a small whipstitch to attach the rooftop snow at the top left corner.
Attach the window in the center of the house with a whipstitch. Position the wreath base at the bottom of the roof, slightly overlapping the house, and attach with a small whipstitch at the outer edge only.
Using two small stitches for each, attach the leaves to the wreath base, lining up the inner edge of each leaf with the inner edge of the base. You can tuck each successive leaf between the wreath-base edge and the previous leaf's edge.

Attach the tree snow to the left branch of the tree with a small whipstitch.
Position all three pieces of the snowman's body to the left of the tree, getting them just how you like them. Pin and attach each segment with a running stitch. (I also attached each segment to the other with a couple of whipstitches, to ensure a tight connection.)
Insert the side piece of the scarf into the space between the snowman's head and his middle, and attach with a few stitches. Then position the neck piece and attach with a running stitch all around the edge.
Attach the eyes and buttons with a small "x" of black thread in the middle of each. (Though I've used felt, tiny black buttons would work very nicely here, too!)
Using brown embroidery floss (all strands), make arms with two side-by-side rows of backstitches. The position of the arms is totally up to you!
At the end of each arm, attach a mitten, using a running stitch.
Use a sharp pencil to mark "let it snow" (or any winter greeting you like) on the banner, and trace the letters with a small, neat backstitch in turquoise floss (two or three strands).
Use a running stitch to attach the banner to the snow bank.
Use a doubled strand of black thread or floss and a backstitch to outline the window and create a t-shaped crosspiece inside the window.
The hard part is over! Now to neaten the back, trim away some of the excess fabric, and run a bead of glue (almost any kind you have will do) around the inner hoop. Now fold the fabric down all the way around the hoop, pressing with your thumbs and fingers until the glue takes hold of the fabric. Let the glue dry, and trim around the hoop, using your pinking shears, until you end up with a neat, close edge. (I haven't photographed this step, but you can see it in the "Pink House" tutorial if you want to.)Tah Dah! Let this little man welcome your holiday guests this year!

Sunday, November 7, 2010

How To Felting

Recently Jayme of Roadside fame has been sharing some behind-the-scenes images of her mind-blowingly gorgeous work, and I guess I'm just gonna go right ahead and copy her. Not the mind-blowing stuff, just the behind-the-scenes. So here are the first several steps I take to produce a custom house portrait--in this case a church portrait:I start, of course, with photos provided by the client--usually several, just to make sure I really understand the structure.
Then I make a sketch--this helps me decide on the composition of the piece--the final, front view I will try to create on the hoop, and it's how I break the house into its composite shapes. I put the fabric on the hoop, sometimes doing a little patchwork on the machine first if I want more than one color in the background. Here I've just used a nice, pale-blue cotton.
It's time to choose felt colors, and this can be a real challenge. Wool felt actually comes in lots of shades, but the world comes in infinitely more, so often there's no exact match--or even anything close enough for total comfort. I try to select colors that look good together and recreate the spirit of the subject. I've never had anyone say, "Hey, my house isn't ochre! It's Cinnamon!" I think I worry about it more than the clients do. If I'm really nervous, I send images of the color options, but mostly I just trust my instincts.
Now I'm ready to cut the basic foundation shapes. Looks a bit like a castle at this point, huh? Let's hope that comes out in the wash. (This "wash" is metaphoric, you understand. I'm not washing these babies.) See my scissors? Ginghers. Expensive? Yes. Worth it? Oh, yes. I got mine for 40% off with a Joann's coupon, cuz that's how I roll.
I cut the tiny bits and pieces next, and sometimes they can be truly tiny. I use those little embroidery scissors for the really tortuous cutting. I construct the whole scene as I go, only to dismantle it in order to...
...sew the pieces on, layer by layer, bit by bit, mainly with a simple (hopefully even) running stitch.

Folks, I know you're on the edge of your seats, but that's as far as I got today. It's a rush job, though, so you won't have to wait long for Part 2 of this hairraising drama.

(Hey--prezzies in the mail tomorrow, girlies! Wait for it!)

How To Felting

I am terribly frustrated because I can't get any good pictures of the final product--the light's bad everywhere, even in the upstairs space because the skylights are covered with snow. I could wait until it melts, but let's face it, friends, it might be months. Love me a Maine winter. On top of the light situation, for some reason the pictures I am getting make the left hand tower look really wonky, and it just isn't. It's as straight as it is in the "before" shots. You'll just have to trust me.

All that said, here's the rest of the process:
This is the basic foundation with all the yellow bits sewn on.
Then I sew on the upper layers of felt and begin the embroidery. I use embroidery for details too small for felt cutouts or sometimes just for a particular texture. Here, I've started with a chain stitch and then covered it, satin style, to create the church's trim.
Once I've finished all but the pickiest stitched detail, I usually do the foliage--the piece really comes to life, I find, when I add trees, bushes, or flowers (or as Annabelle puts it, they're boring up till this point--kid really doesn't pull any punches).
This loose, running stitch in white helps create the feeling of brick, and I've had a lot of fun with the stained glass in pretty sky blue.The next thing I do is the add the text if there is any.
Then it's time to affix the fabric to the hoop, and for this I just use plain old Tacky glue, running a bead around the hoop, folding the fabric down tight, and smoothing it with my fingers.When it's dry, I pink the edges of the fabric to prevent its unraveling.
And that's it. When my camera battery is charged, I'm going to try to take a couple of better photos, but you get the idea.

It was great fun to do something different, but no matter the subject, I'm always so thrilled to participate in memorializing a part of someone's life. It's an incredible feeling, this--knowing that people are appreciating your creative work, even loving it, by incorporating it into their own daily lives.

You know what? I'm happy.