Showing posts with label Mel's Priority. Show all posts

Thursday, March 11, 2010

Pillow Top Towel


Pillow Top Towel
It's the best name I can come up with, so that's what I'm gonna call it.

*I've been thinking about this project for quite a while, so I hope you like it! *

This towel is for a baby to lay on after his bath. It's absorbent, soft and fluffy. It has a blanket like quality, yet it's a towel. It is perfect for cushioning a hard surface (like the floor or a counter top) while drying, lotioning and dressing a baby. Heck, I need to make one for me now.

Here is the one I made for Cohen (the cutest dang baby I've ever seen!)


And here (not wrapped yet):


Here is what you do. First find a towel without any ribbing. I found mine at JC Penney. Fold in half. If you want to do some applique, do it before the next step.

After you applique, fold in half, right sides together. Sew around edges. Leave 6 - 8 inches in the top-middle open.

Cut batting to the size of the towel.


Fold batting in thirds and insert into the opening in the top.


Open batting in the towel and smooth flat. Hand stitch the opening at the top closed.

Quilt the towel with a large blunt needle and the yarn of your choice.


I placed quarters on the towel to map out where I wanted to thread the yard.


After you thread and knot your ties, cut with scissors to desired length.


That's it. A soft, puffy towel for baby.


Wet Bag Tutorial

From: Little Birdie Secrets


Summer is around the corner and that means swimsuit season! After swim lessons or playing in the pool I’ve always rolled my children’s swimsuits up in a towel. Unfortunately, this always ends up in a big mess and my whole bag, stroller, and car somehow get wet. This year I will be prepared because I now have a mommy’s secret weapon: the wet bag. This handy little bag is lined with plastic vinyl inside to contain all that water and wet stuff. Just zip it close and carry it home. Simple. This bag is also perfect for all those parents currently potty training. When your little one has an accident you can just slip the messy pants into a wet bag and no worries. The best part is that you can clean the inside of the bag with Lysol or any cleaner. Just wipe it down. Here is a quick tutorial on how you can make your own wet bag.

What you'll need:

*Fabric of your choice. It can be cotton, denim, flannel, or whatever you want.
*Plastic or vinyl. I bought mine at Walmart super cheap. It feels like a thin plastic shower curtain. If you can’t find this at your local fabric store, you could always try a very inexpensive shower curtain.
*Zipper-mine was 14 inches.

1. I cut my fabric and plastic 12 inches by 14 inches. You can make yours bigger or smaller. Just make sure you have a zipper that is long enough. I would make sure it was a couple inches longer than your cut pieces.

2. Place the zipper right side up along the top 12 inch side of your plastic/vinyl. Place your fabric, right side down on the zipper lining up the top edges (12 inch side). Sew it together. Take your time because the plastic/vinyl is slippery and likes to move around.


3. Open up your two pieces and top stitch down through the outside fabric, zipper, and plastic.


4. Just repeat steps two and three on the other side. Sandwich the already sewn side between the plastic and the outer fabric, lining up the top 12 inch edges.


5. Open up your zipper halfway.

6. Open up the fabric so the outer layers are together, right sides together. Line the vinyl/plastic up. Starting at one side sew three of the four sides together. Be sure to leave the vinyl/plastic 12 inch side alone. Do not sew that side together.


7. Very carefully, pull the sewn fabric layer up through the bag and turn the whole bag inside out.


8. Fold in the 12 inch side of plastic/vinyl in by a quarter to a half an inch. Sew this side. Then very carefully push this vinyl back into the bag.


You’re done! Zip the bag shut and you now have your own wet bag.

Monday, March 1, 2010

DIY Painted Canvas Art

From: The Creative Crate

First...I started off with a 16x24 canvas ...that I painted white...

Then...used my Cricut...and cut out the words that I wanted to stencil on the canvas...
Then...laid the letters on the canvas to decide where I wanted them...and marked lightly with a pencil...


Then used the stencil part of the cutouts...and taped the middles of the letters to the stencil so that my letters have middles...{hope that made sense?}


Then...line your stencils up to your markings you made...and start stenciling.
TIP: I placed a few books under my canvas to give the canvas a flat, hard surface to make it easier to stencil on.


Then fill in your tape marks from the letter middles...

Then...I wiped stain on the edges of the canvas with a rag {I use Minwax ...dark walnut stain}...


And there you have it!!! Very simple...and FuN!


HaVe a GreaT Day!!

Thursday, February 25, 2010

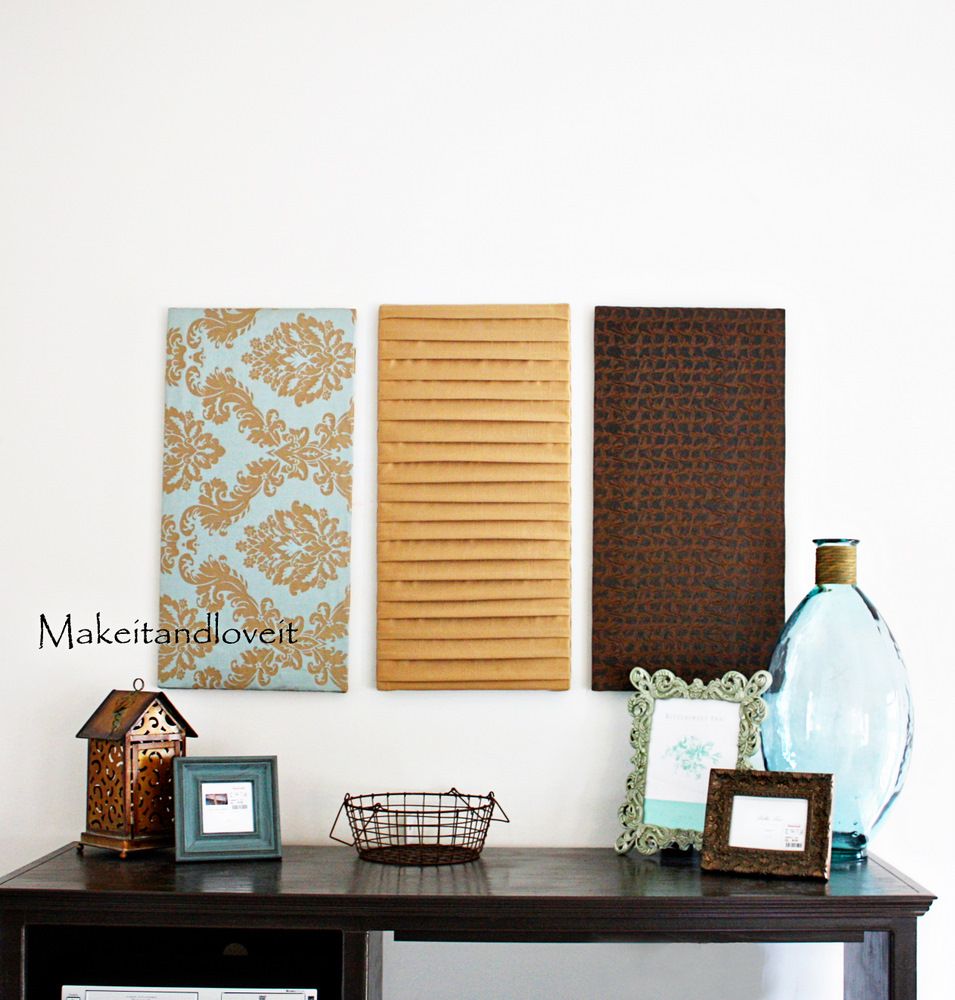
Fabric Wall Hangings

From: Make it and Love it

We have a big space above our entertainment center.
And a fairly tall ceiling.
So I came up with a solution to fill up all of that plain 'ol wall.
(No paint allowed......oh, the life of a renter.)

(Ignore those empty picture frames......pictures are being printed.)


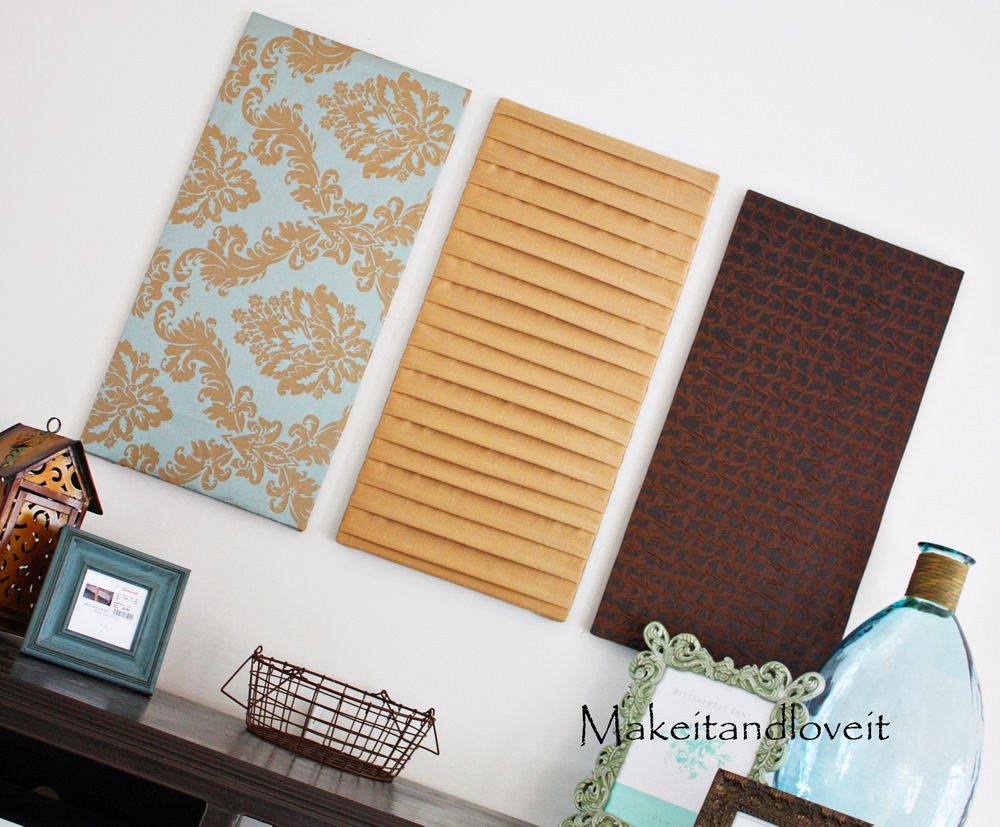
Do you remember when I made some wall hangings a while ago? Well I wanted some big ones for our front room. But a custom size, different than the art canvases available.....and a bit cheaper.

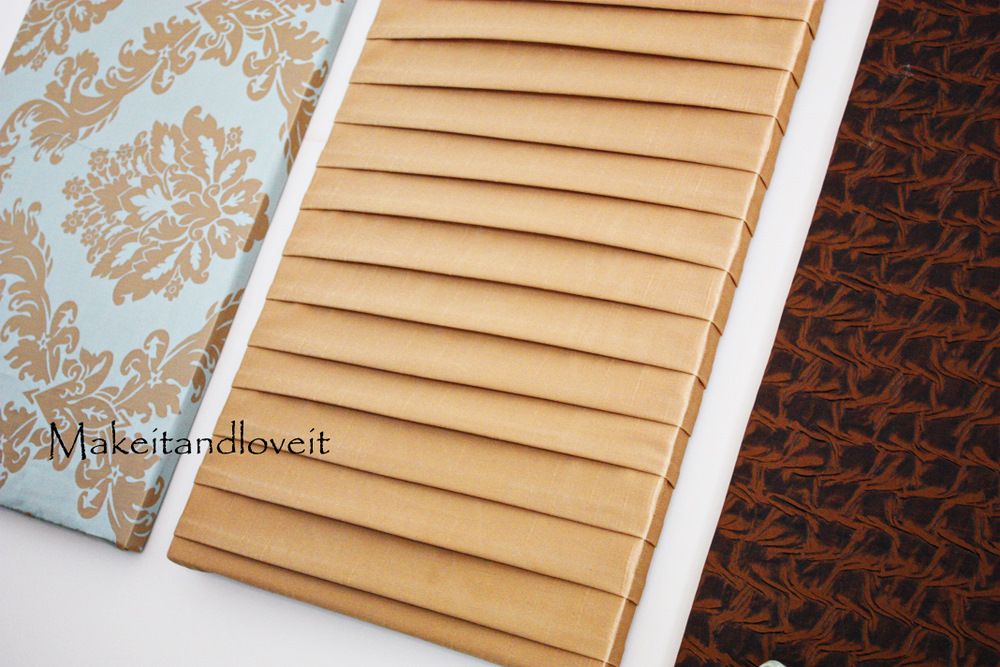
And I added a bit more texture this time around.....


Ah, just right for our space.


So I bought a piece of underlayment from Home Depot. I have no idea what it's intended for but it was $5 for a 4 x4 foot piece...........just perfect for my budget. (all of you carpenter minded folks......just keep the laughter minimal.) It's super thin and some sort of pressed wood. I cut three pieces that were 15 x 30 inches.


And did you know that there is a sale section at the hardware store? (I was at home Depot)
Yeah, just like a sale rack at the back of the clothing store. Man, I am a sucker for a good sale. (Especially at the clothing store, but we can talk about that later....)
And once I saw those markdown signs of $0.50, $1.00, and $2.00, I dove right in.
That's where I found some scrap wood to make the frame for the wall hangings.

Gosh, I guess the pieces of wood are about 1 x 2 inches. They weren't the full lengths and must have been used for other things and then the scraps were thrown into the sale bin. (So save your change and go on and check out your nearest hardware store.)

So I cut my pieces of wood to fit within the size of the large piece of underlayment. The 2 long pieces were 30 inches long and the 2 end pieces were 11 inches long.


Then I used a staple gun to attach them at the corners..... (you can use nails and make diagonal corners and such......but this is a quicker and perfectly stable solution. They don't hold much weight at all.)


And then stapled the underlayment piece right to the wood frame.


Then I cut a piece of material slightly bigger than my form, making sure to have enough excess fabric to fold around the back. Pull fairly tight and staple in place.....


And fold the corners over nice and snug.....


For the center gold wall hanging.........I made folds in my piece of fabric and pinned and ironed as I folded.


They weren't huge folds, just enough to tuck the fabric underneath.


The fabric I used was sort of satin-y so the folds didn't stay ironed perfectly well. (If using a lightweight cotton, you shouldn't have the problem I did.) So I sewed the folds in place at the sides and kept the center pinned.......


And then staple the fabric (with the pins still going down the center) to the wooden form, making sure to pull the edges tight, securing the folds in place. (Start on one of the sides and staple along the entire side. Then pull as you are stapling the other side. Then staple the shorter ends.........but don't pull to hard on the ends, or you will pull on the folds a bit.) Then take the pins out.


Pound in some nails and hang up your new focal point to the room.

Scrabble Tile Pendants


I’m excited to share this tutorial for Scrabble Tile Pendants from Mark and Stefani at HomeStudio. They’ve so graciously provided this how-to for making these lovely pendants to all of us crafters. These pendants are great for necklaces, charms, and gifts to give. To purchase these pendants with HomeStudio’s one of a kind designs, please visit their Etsy shop.
Scrabble Tile Pendant Tutorial
Supplies needed: · Paper · Scrabble Tiles · Scissors · Craft Glue · Metal File · Mod Podge · Small Paint Brushes · Utility Knife · Diamond Glaze · Super Glue · Small Aanraku Jewelry Bails in Silver
Step 1:
Choose your paper wisely! I use a template card, a little template on an index card with a hole the size of a scrabble tile. That way when I shop for paper, I can see if the pattern will fit the tile. You can use almost
any paper you find; scrapbook paper, card stock, Japanese Washi paper, origami paper, gift wrap, even lightweight recycled greeting cards. Everything will become a possibility, so experiment. Using a light box (or holding your paper to the window), use your template card and trace the pattern for your tile. Trim the paper about a 3/4” to 1/2” around your outline. Allow enough excess paper so you can hold the paper while spreading the glue.
Step 2:
Using a paint brush and your light box, “paint” a thin layer of glue (I use Tacky Glue) onto the back of your paper. Place your tile in the box, being sure to notice which way is up so your letter isn’t upside down when you’re finished. I like using a thin glue.
Step 3:
After about 10-20 minutes your glue should be dry. Using a utility knife, carefully trim around the outside of the tile being careful not to cut the tile in the process. The wood is pretty soft.
Step 4:
Gently file the edges of the paper to be smooth and flush with the side of the tile. Since the wood is soft, be careful not to file too hard. You may want to experiment with different types of metal files in order to find the one you like best. The one I use is a medium grit file.
Step 5:
Now you need to seal the paper. Use a paint brush to apply a thin layer of Mod Podge. I like to seal the top and all sides. Let that dry for 10-20 minutes. I like to lay my tiles on wax paper so the glue doesn’t stick to my work surface. A cookie sheet lined with wax paper works perfectly!
Step 6:
Once the Mod Podge is dry, it is time to apply the Diamond Glaze. Do NOT shake the glaze. First, I like to make a little dot on my wax paper. The first dot usually has a bubble & I’d rather have it on the wax paper than on my tile. Holding the bottle at an angle, apply the glaze around the edges and then fill in the middle. Be sure to get close to the edges. The glaze shouldn’t roll off the edge, but in case it does, just file it off when the whole thing is dry. If you get a bubble, which will happen, just use your fingernail to pull it off the tile. You can use a needle, but I find that is harder to do. Diamond Glaze is water soluble, so it just washes off with soap and water. Now let your tile dry for a minimum of 4 hours. Dry your tile in a cool place where it won’t get bumped by anyone.
UPDATED:
I let mine to fully cure 3 days before packaging it. The glaze manufacturers may suggest less time but to be safe, plan on 3 days.
Step 7:
Now attach the silver bail. Hold the bail with your fingers, put a drop or two of glue and hold the tile in place. I like to use Super Glue because then it’s stuck “forever”! The only down side, is that if the bail isn’t exactly centered, it’s tricky to remove. In seconds, it’s attached and ready to go!
Step 8:
Now to clean up any rough edges. Get your metal file again and smooth down any rough edges and excess glue. Now you’re finished! Enjoy your pendant.
© 2008, HomeStudio. All rights reserved. Use of designs, images, or content without permission is prohibited. Please contact homestudio111{at}gmail.com for permission of use. Please feel free to use this tutorial for personal use and have fun crafting!