

Showing posts with label Toys. Show all posts
Showing posts with label Toys. Show all posts
Thursday, July 29, 2010

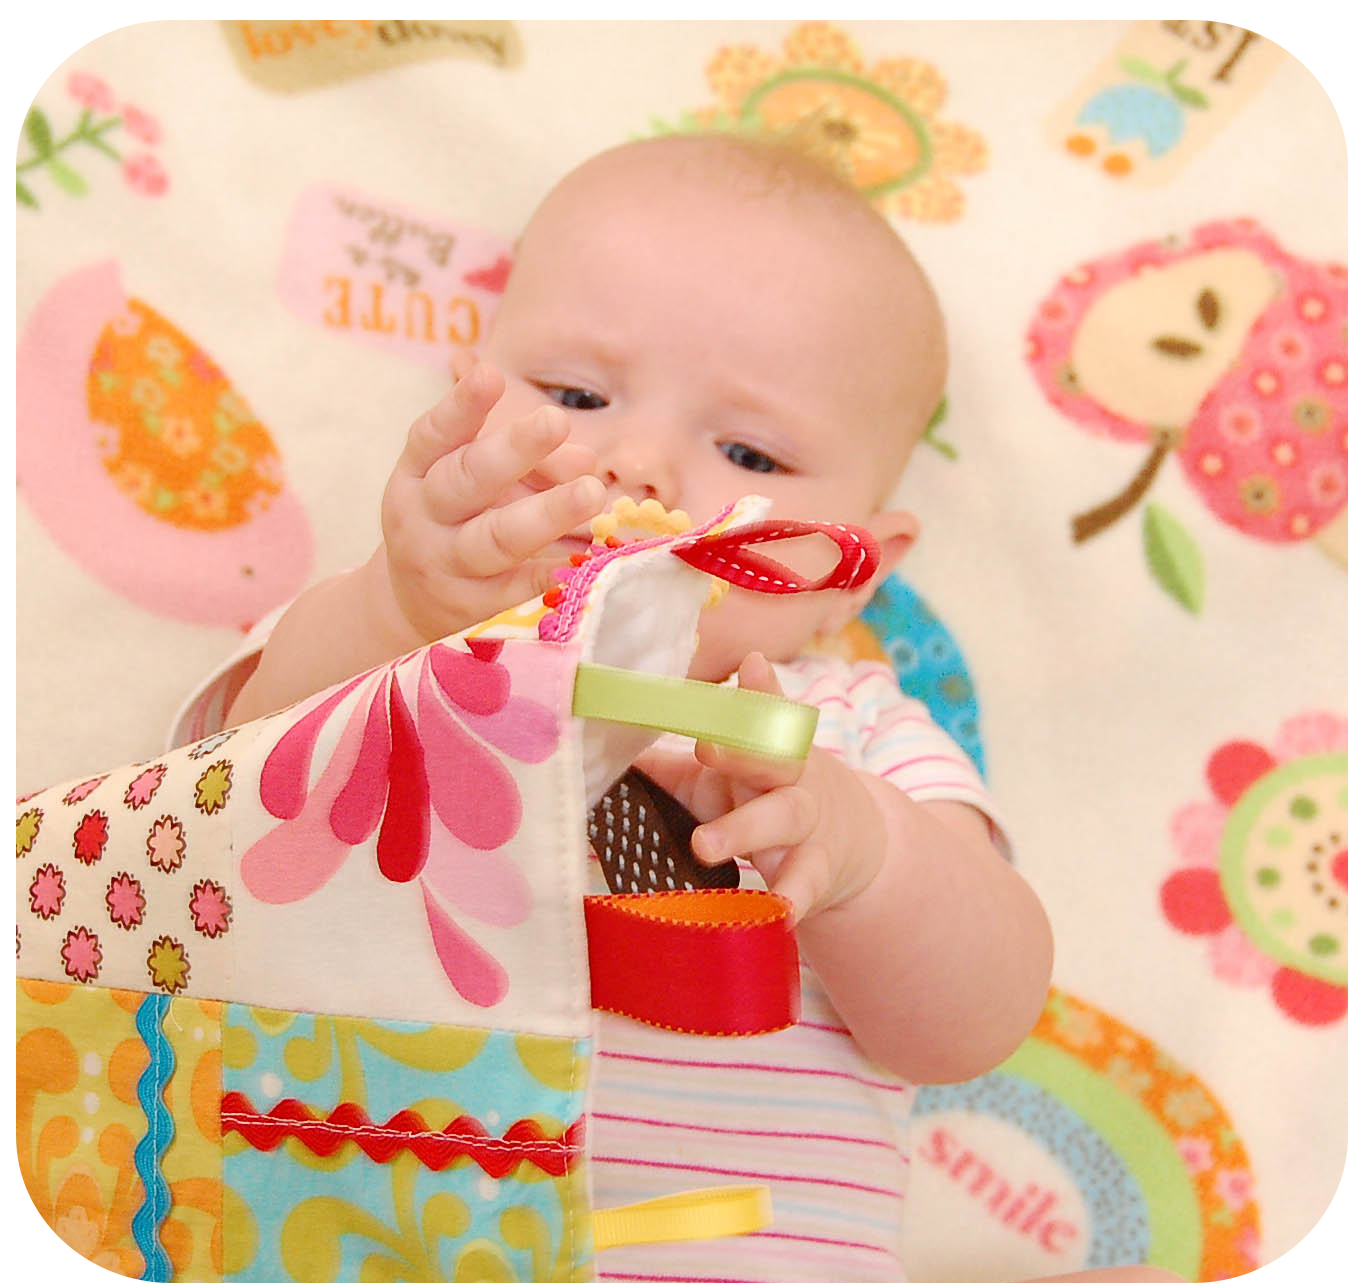
Crunchy Baby Tag Toy


 Back when I had Brooke, my DEAR,dear, dearest friend Pam sent a package of baby goodies and within her box of creations was a cute baby tag blanket. It's soft, chewy, and Brooke loves it! {love ya, Pamsies!}
Lately, Brooke is obsessed with the crunchy, plastic baby wipe packaging and I can't change her diaper without{carefully}hiding it from her. So I'm making her a *crunchy* tag blanket toy and now we'll have one of each! One for quiet times and one for her to be loud with! Perfect!
This little project was simple - no special measurements, just eyeballing. You can eyeball, right? So go grab some fabric scraps, some ribbon scraps, and join me!

Now cut six squares of random pieces - five rectangles cut in half. I believe mine were 4 x 7 and then I cut them in half.
I also played with various colors of
trim on the square pieces and loved it! You'll want to sew those onto the squares before you piece them together.
Sew the squares together with right sides facing; press open

Then sew the rows together, right sides facing; press open.
Now I'm not a quilter, I don't have the nerves for it...and you can see why. Even though I measured everything, cut all of my squares perfectly square, they still didn't line up whilst sewing them together. WHY??? I don't know. But who cares, right?! It's still darn cute. (plus, babies don't care.)

Then you square up your lines with your rotary cutter & ruler after your pieces are all stitched together.

Now pin on your ribbons. Get creative, colorful, and have fun! Velvet textures are great, too, but I couldn't find any.
Now on to the crunchy part. This is a piece of the baby wipes packaging I cut up - I probably could have done a better job at getting a larger piece, but it isn't going to matter. The thing will crunch! But because it's smaller than my top and bottom piece, I'm going to sew it onto the wrong side of my fabric before I do anything else so it will stay put.

There! Now it's secure and not going to go anywhere. If you don't want this big of a piece, do strips, circles, or random patches on this bottom piece. That way you'll still get crunch without it being SO crunchy!
Next, you should baste your ribbons all the way around before you stitch the thing shut like I did, that way you can remove your pins. You don't want to turn this right-side-out with pins in it. {durh...wish I would have thought of that sooner...}
Then put right sides together, sew around leaving about 6 -8 inches opening in the side. Clip your corners and trim up the trimmin's - you know the drill.
Turn your fabric right-side-out; press flat.


Now you can put that last little ribbon in place while tucking the hole back into place.
Sew close to the edge all the way around, securing the opening and finishing the piece.
And that's it! Now go grab yourself a cute little baby and let 'em barf all over your hard work!
Brooke LOVES this, by the way!!! I even think it exceeded her low expectations. haha.


Sunday, July 11, 2010
Cozy Car Caddy
 Thanks to everyone who voted for this project in the So You Think You're Crafty competition! It was an exciting week.
 Without further ado ...
Cozy Car Caddy Tutorial
Materials used:
two pieces of denim (17 x 10 inches and 17 x 6 inches)
one piece of Duck Cloth or other heavy fabric (17 x 10 inches)
gray and yellow felt (gray felt cut to 17 x 3 inches, yellow felt cut into seven 1 x 1/4 inch pieces
White Piping (two 17 inch pieces)
6" belting
1" Velcro
scrap fabric for applique
freezer paper, sponge brush, and acrylic paint
sewing machine and supplies

1. Cut your fabric. I used an old pair of jeans for the denim and duck cloth for the front. Between the two heavy fabrics, it makes for a sturdy car caddy.

2. Take your 17 x 6 inch piece of denim, fold it in half, and press. This will be used for the car pockets. Line up the raw edges of the denim with the bottom on the duck cloth and pin in place. Sew along the bottom edge to secure.

3. Sew vertical lines through all the fabric (3 layers, since the denim is folded in half), spacing the lines 2.75 inches apart. Be sure to back stitch at the top and bottom. If your child is especially rough on pockets, you may consider going over each line a second time.

4. Sew your road piece centered in the top half of the duck cloth. Pin the road dashes in place and sew around each dash using a coordinating thread. Set the duck cloth aside.

5. Add a car applique to the denim backing. Center the car in the bottom half of the denim (see photo below). When the caddy is folded together, the top half of the denim will be inside.
I used scrap cotton fabric for the car body and felt for the wheels. You can use a fusible web like Wonder Under to hold your applique in place. I was all out, so I just pinned and sewed.

6. Add decorative piping to the top and bottom of the denim backing. Actually, add the piping all the way around as well ... I only had enough on hand for the top and bottom. ;)
Line up the raw edge of the piping with the raw edge of the denim. Pin in place and sew in place
along the existing stitch line on the piping.
7. Pin the 6 inch piece of belting to the denim fabric, again lining it up centered on the edge of the bottom half of the denim piece (see photo above). Leave about 1/4 to 1/2 inch overhang, so it will be enclosed between the denim and duck cloth layers when they are sewn together. Stitch the belting in place using about a 1/4 inch seam (go over it a few times for extra strength)
I forgot to take a few pictures at this point ... bear with me.
8. I added my velcro pieces last, but now would actually be a better time to do it. Sew one side of the velcro to the end of your belting strap, and the other piece in the center of your car applique.
9. Lay the denim piece and the duck cloth piece on top of each other, right sides facing together, and pin. Sew around the edges using a 1/4 inch seam (try to follow the seam of the piping along the top and bottom). Leave about a 3 inch gap for turning the caddy right side out.
10. Turn the caddy right side out and pin the opening closed. Sew around the entire outside edge again, closing the opening. Go slowly around the bottom corners - all that denim gets thick.
11. Fold the caddy in half horizontally and make a crease. Sew a seam, following the crease, down the middle of the caddy (between the pockets and the road - see the final product photo for seam placement). This will make the caddy easier to fold up.

12. Using the templates found at the end of this post, cut the numbers out of freezer paper. If you've never done freezer paper stenciling, you can find easy instructions at Angry Chicken (and everywhere else online - do a google search and I promise you'll find tons of help).
I sponged 3 light layers of white acrylic paint for my numbers (let each layer dry before applying another).
Fill your pockets with matchbox cars, and you are ready to roll.

Here's how it folds: Fold the caddy in half so the road meets the pockets. Then fold in thirds. Wrap the strap around the front and velcro closed.


Enjoy!
p.s. This project is similar to Sharla's Car Cozie at My Little Gems, who I have just recently gotten acquainted with. If you plan to make this project, you should check out her tutorial as well, since they are different and you might like her construction better.
Also, check out this awesome car caddy/crayon roll combo project at Create Studio. Love it!
Thursday, February 25, 2010
Cloth Blocks
From: Make it and Love it
Here you go........add some more fun to the cloth baby toy collection.

Go on, downsize that scrap box.
What you'll need to make one block:

Go on, downsize that scrap box.
What you'll need to make one block:
- 6 squares of fabric....any size will do. (The block pictured is 4 1/2 x 4 1/2 inches.)
- Batting
- Thread
- Sewing Machine
**Seam allowance is 1/4 inch for this project.**
Start by cutting out your squares.

Then, sew 4 of your squares together to make the main body of your block.

Then, snip little corners (1/4 x 1/4 inch) out of all four corners of your two remaining squares.

Then pin it to the main body, with right sides together. Fold the little square openings together at the sides, creating a square corner as you pin.

Sew it into place.

Do the same with the bottom but leave one side open so that you can turn it right side out.

Turn it right side and and poke out the corners so that they are nice a sharp/crisp. Stuff with batting. Fill it up pretty well so that the block will hold its shape.

Fold down both sides of the opening a 1/4 inch and hand stitch it closed.

All done.
Now you have a block (or blocks) to accompany your rings.

Start by cutting out your squares.

Then, sew 4 of your squares together to make the main body of your block.

Then, snip little corners (1/4 x 1/4 inch) out of all four corners of your two remaining squares.

Then pin it to the main body, with right sides together. Fold the little square openings together at the sides, creating a square corner as you pin.

Sew it into place.

Do the same with the bottom but leave one side open so that you can turn it right side out.

Turn it right side and and poke out the corners so that they are nice a sharp/crisp. Stuff with batting. Fill it up pretty well so that the block will hold its shape.

Fold down both sides of the opening a 1/4 inch and hand stitch it closed.

All done.
Now you have a block (or blocks) to accompany your rings.

Subscribe to:
Posts (Atom)