Showing posts with label Organizing. Show all posts

Friday, April 15, 2011

Grocery Bag Dispenser

My husband is always throwing away all my spare grocery bags because they are in disarray in my pantry.  I need those for dirty diapers!  I finally got around to making this cute dispenser bag and thought I'd share it with you...


Materials
1 fat quarter (18" x 22") print
1/4 yard coordinating solid
2 - 1" x 20" strips interfacing
22" x 29" batting
22" x 29" muslin for backing
11" of 3/4" wide elastic
2 - 1/4" eyelets

Directions
1.  Cut the print fat quarter down to 18" x 20".  Save the leftover strip for the bag's handle.

2.  Cut the coordinating solid into the following sizes:
                 2 - 5" x 20" rectangles
                 1 - 2 1/2" x 20" strip (for binding the top)

3.  Sew one 5" x 20" rectangle to the top of the 18" x 20" print and one to the bottom using a 1/4" seam allowance.


4.  Before sewing the decorative stitching on the red solid, we will add interfacing to give the material extra support.  Pin the 1" x 20" strip interfacing to the wrong side of the red solid along the seam you sewed in step 3.  Do this at both the top and bottom seams.


5.  Sew a decorative stitch about a 1/4" from the seam on top of the interfacing.  Use the seam as your guide. I chose a little leafy stitch to pick up the leaves in the apples.  Sew decorative stitching at both the top and bottom seam on the red solid.


6.  Now make your quilt sandwich.  Muslin backing on the bottom, then batting, and quilt top on top, making sure to center the quilt top over the larger layers underneath.  Baste with pins.


7.  Now it's time to quilt.  Important!  Only quilt the top red solid and the print portion of your quilt.  Leave the bottom red portion unquilted.  It will be much easier to make the casing for the elastic and gather it all up if  the bottom is left unquilted.  In addition to stippling an all over pattern on the top two portions of the quilt, I also stitched-in-the-ditch using a walking foot at the seam where the print meets the bottom portion of the red solid.

8.  Trim the excess batting and muslin from all sides of your quilt.

9.  Trim with scissors the unquilted batting and muslin from the bottom portion of the quilt to reduce bulk.


10.  The top of the quilt is finished with binding.  The bottom has elastic casing to keep the grocery bags in.  The next step is to make the binding.  Using the 2 1/2" x 20" strip of red solid cut in the beginning, fold it in half widthwise, wrong sides together.  Place the raw edges of your folded strip against the raw edges of the top of the quilt and sew across the entire length of the strip, 1/4" from the edge.


11.  Fold the binding strip over and sew the entire length of  the strip to the back of the quilt, using a top stitch (about 1/8" from the edge) to secure the binding.


Here's what the binding looks like from the front.


12.  Now we turn our attention to the bottom of the quilt to make the casing for the elastic.  Fold the bottom edge under 1/4" and press.


13.  Fold again, this time 3/4" to create the casing for the elastic.  Slip your elastic strip in there just to make sure it fits.  Press.


14.  Stitch a topstitch (about 1/8") from the edge of the casing along the entire width of the quilt.


15.  Use a safety pin, threaded through the end of your elastic to feed the elastic through the casing.  Make sure to hold on to the other end of the elastic so it doesn't disappear into the middle of your casing sleeve!


16.  Fold the quilt in half with right sides together.  Match the seams where the red solid meets the print and pin in place.  Also make sure to match the elastic and casing sleeve.  Then sew along the length of the open edge to create a cylinder with one gathered end.


Turn it right side out, and it looks like this!


17.  Next we'll make the handle.  Grab the leftover strip of print you cut off earlier.  It should be about 2" x 18".  To have finished looking ends on the handle, fold under (wrong sides together) about 1/4" on each short edge and press.


18.  Fold the strip in half widthwise, right sides together.  Then sew along the entire length of the strip about 1/8" from the edge.  Turn the strip right sides out.


19.  Using a pen, mark the desired location for the eyelet hole.  I placed my eyelets about 1/2" down from the binding.  If you are looking at your cylinder from the top (with the gather at the bottom), place the lengthwise seam at 12 o'clock or at the back.  The front of your bag, the part you'll see is now at 6 o'clock.  Ideally, you should place the eyelets at 3 o'clock and 9 o'clock.


20.  Follow the manufacturer's instructions for the eyelet press to install the eyelets at the locations you have marked.  Thread the handle through the eyelet and tie a simple knot on the end.


Done!  And now you have a beautiful way to store these bags for recycling!

Thursday, July 29, 2010

Wine Rack Yarn Storage

794611807_7wZWQ-475x475.jpg

Fabric Luggage Tags

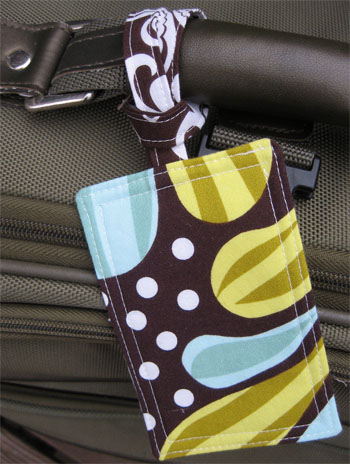
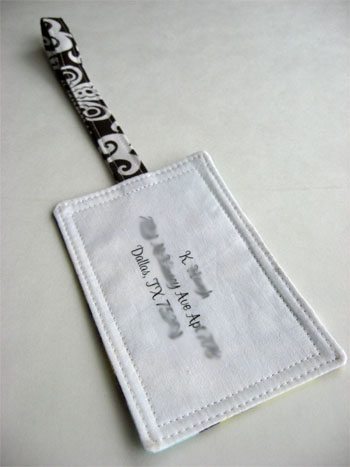
These custom fabric luggage tags would make a useful little gift for any friends, family, co-workers or teachers that travel. They are also a great way to use up some fabric scraps.
FabricLuggageTag6

Handmade Custom Fabric Luggage Tag Tutorial

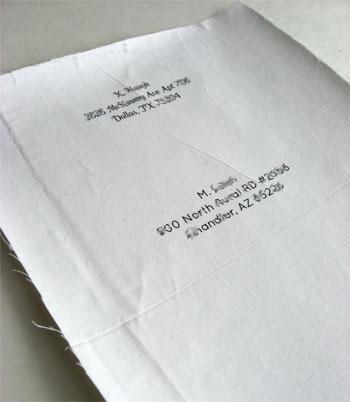
To print name and address on fabric, cut white muslin and freezer paper 8 1/2" X 11". Iron shiny side of freezer paper to back of fabric. Send paper through an ink jet printer. You can also buy fabric especially made to go through the printer. I also talk about this technique here. Press printing when finished to help set ink. You could even scan in a business card and print that onto the fabric.
FabricLuggageTags1
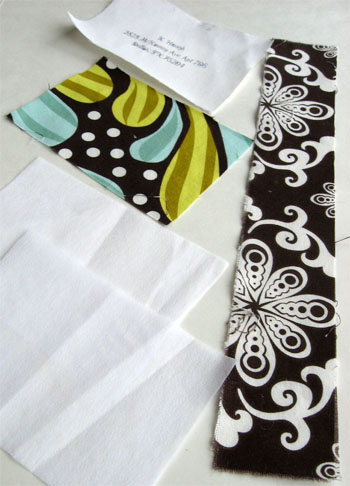
Cut one  3 1/2" X 5"  piece  of printed fabric with name and address, 1 - 3 1/2 X 5" piece of fabric,  two  3 1/2" X 5" pieces of heavy weight iron on interfacing and one  2" X 12 piece of fabric for strap.
FabricLuggageTag
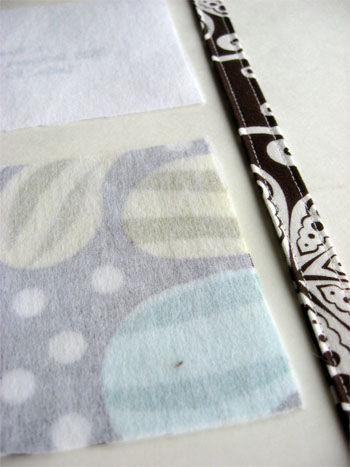
Following manufacture's instructions iron interfacing to wrong side of both 3 1/2" X 5" pieces of fabric.
Press strap piece in half lengthwise, open up, press each side to the middle then fold in half. Edge stitch down each side. For an illustrated example seetote bag instructions.
FabricLuggageTag2
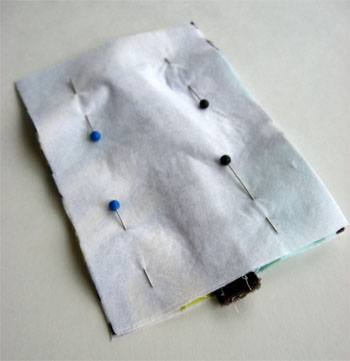
Pin fabric pieces right sides together. Fold strap in half and place inside the fabric with cut edges sticking out 1/2". (Make sure not to accidentally stitch into strap as you sew around the edge.)
FabricLuggageTag3
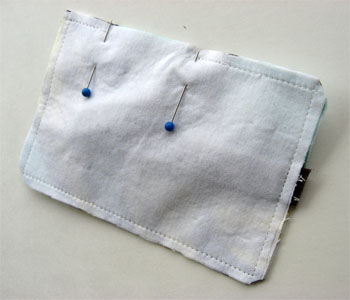
Using 1/4" seam, stitch all the way around the outside edge, leaving an opening for turning.
Clip corners.
FabricLuggageTag4
Turn, press, and edge stitch along the outside edge making sure to close the opening. Stitch another row of stitching if desired.
FabricLuggageTag5
I have entered this in Today's Creative Blog, Get Your Craft On.  So many wonderful ideas linked up over there.


OPTION 2:

FabricLuggageTagforBusinessCard3.jpg

Boxy Cosmetic Bag


Look! Something you can make for a man!
OK, so this one is for my friend Felice. Not a man. But a woman who enjoys cosmetics and bags and just had a birthday. It has a canvas outside and oil cloth inside for spill containment and easy wiping clean. But oil cloth not required.

I used Echino by Etsuko Furuya, Quiet Ground, Oil Cloth in Natural and the matching canvas, both available at Fabricworm.
Sizing is up to you. My finished boxy make up bag is quite large. You might want to make yours smaller. I don't know any man that would need this much space for his toiletries.
So my pieces measure:
2 pieces canvas outer 16X14
2 pieces oil cloth lining 16X14
One 16" zipper
but i suggest, for a more normal size, going 14X12 with a 14" zipper
1. Cut your fabric.
2. Lay one piece of canvas (or whatever outer fabric you are using) right side up. Lay your zipper facedown with the zip to the left with the top edge of the zipper lined up to the top edge of the fabric. Now lay a lining piece (oil cloth) facedown on top, with top edges lined up, like so:

Sew in place with your zipper foot:

Now fold your pieces wrong sides facing.  Lay your other outside piece right side up. Now lay your zipper and assembled pieces with the outside fabric face down and the lining fabric facing up as pictured. The zipper will be face down with the zip to the right this time. Make sure all the top edges are lined up:

Lay your other piece of oil cloth (lining) right side down on top with the edges aligned.  You can pin at the very edge (pins leave holes in oil cloth but you won't see these in the final bag):

Sew in place with your zipper foot.
3.  Flip all the pieces around so the zipper is at the top and your oil cloth (lining) pieces are on the outside right side up.  Sew straight across the bottom:
4.  Now bring the seam you just sewed to the center, above the zipper like so. Unzip the zipper halfway so you can turn it inside out when you're done:

Flatten it out and sew up each side, across the zipper.  Reinforce the zipper edges by sew back and forth over them a few times.  Trim your edges:
4.  Now pouf up your bag, still with the oil cloth to the outside.  Pinch each corner in and pin it.  Determine what height you like and draw straight line at the same measurement across each triangulated corner (i did 5"):

Sew that line with a straight stitch:

Cut off the triangle:

Repeat pn al four corners.  Now your bag looks something like this:
Turn it right side out.  You're done!
Pretty quick and simple right?
Stuff with sunscreen and the like.  Don't worry about spills, you can wipe it clean!