Summer is around the corner and that means swimsuit season! After swim lessons or playing in the pool I’ve always rolled my children’s swimsuits up in a towel. Unfortunately, this always ends up in a big mess and my whole bag, stroller, and car somehow get wet. This year I will be prepared because I now have a mommy’s secret weapon: the wet bag. This handy little bag is lined with plastic vinyl inside to contain all that water and wet stuff. Just zip it close and carry it home. Simple. This bag is also perfect for all those parents currently potty training. When your little one has an accident you can just slip the messy pants into a wet bag and no worries. The best part is that you can clean the inside of the bag with Lysol or any cleaner. Just wipe it down. Here is a quick tutorial on how you can make your own wet bag.
What you'll need:

*Fabric of your choice. It can be cotton, denim, flannel, or whatever you want.
*Plastic or vinyl. I bought mine at Walmart super cheap. It feels like a thin plastic shower curtain. If you can’t find this at your local fabric store, you could always try a very inexpensive shower curtain.
*Zipper-mine was 14 inches.
1. I cut my fabric and plastic 12 inches by 14 inches. You can make yours bigger or smaller. Just make sure you have a zipper that is long enough. I would make sure it was a couple inches longer than your cut pieces.
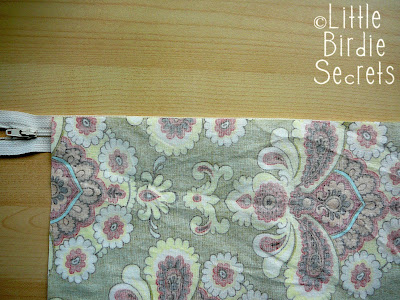
2. Place the zipper right side up along the top 12 inch side of your plastic/vinyl. Place your fabric, right side down on the zipper lining up the top edges (12 inch side). Sew it together. Take your time because the plastic/vinyl is slippery and likes to move around.


3. Open up your two pieces and top stitch down through the outside fabric, zipper, and plastic.

4. Just repeat steps two and three on the other side. Sandwich the already sewn side between the plastic and the outer fabric, lining up the top 12 inch edges.

5. Open up your zipper halfway.
6. Open up the fabric so the outer layers are together, right sides together. Line the vinyl/plastic up. Starting at one side sew three of the four sides together. Be sure to leave the vinyl/plastic 12 inch side alone. Do not sew that side together.


7. Very carefully, pull the sewn fabric layer up through the bag and turn the whole bag inside out.

8. Fold in the 12 inch side of plastic/vinyl in by a quarter to a half an inch. Sew this side. Then very carefully push this vinyl back into the bag.


You’re done! Zip the bag shut and you now have your own wet bag.


No comments:
Post a Comment