
 So...here's how.
I used Adobe Photoshop CS2, but this can be done in any version of Photoshop. The first time I made this was in Adobe Photoshop Elements 2.0.
1. In Photoshop, click File - New (Ctrl+N). Set the width to 8 inches and height to 10 inches, with at least 200 pixels/inch. (I like to do mine at 300 pixels/inch). Click ok.
 From now on I will refer to this as the project.
2. Open (Ctrl+O) a copy of "The Family: A Proclamation to the World".
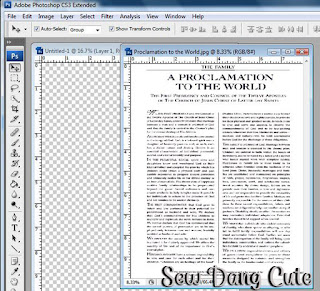 (I got mine by scanning my paper copy and saving it as a jpeg file.) Using your move tool (V), click on the Proclamation, then drag it to your project that you started in step 1.
 Resize by grabbing the dots in the corner with your move tool. Make sure to hold down the shift key while resizing so the width and height change proportionally.
 You should now have your Proclamation all set.
3. Open (Ctrl+O) the photo you would like to use. Using the same method in step 2, drag your image onto your project, and resize as necessary.
4. Now you will notice that your picture is hiding the proclamation. We need to move it behind the proclamation. If you glance over in your layers palette, you will see something similar to this: (If you can't see your layers palette, click on window in the top toolbar and select layers).

5. Layer 2 (The Proclamation) should now be showing. Click on it in your layers palette. At the top of your layers palette is an option that says Opacity. Click on the button by 100% and start dragging it lower. You will notice your image starting to appear through the proclamation. Play around with the opacity until you have it the way you like it. I chose 40%.
 6. That's it! Now we just need to save it. Click File -Save As... (Shift+Ctrl+S). Name it then make sure to change the format to jpeg.
 Now all you have to do is print it off as an 8x10.
 You can make them in black & white, color, family, engagement, wedding, etc.
 They make great wedding gifts if you use the couple's wedding announcement photo! Have fun with it and don't hesitate to ask questions if you have any!
No comments:
Post a Comment