
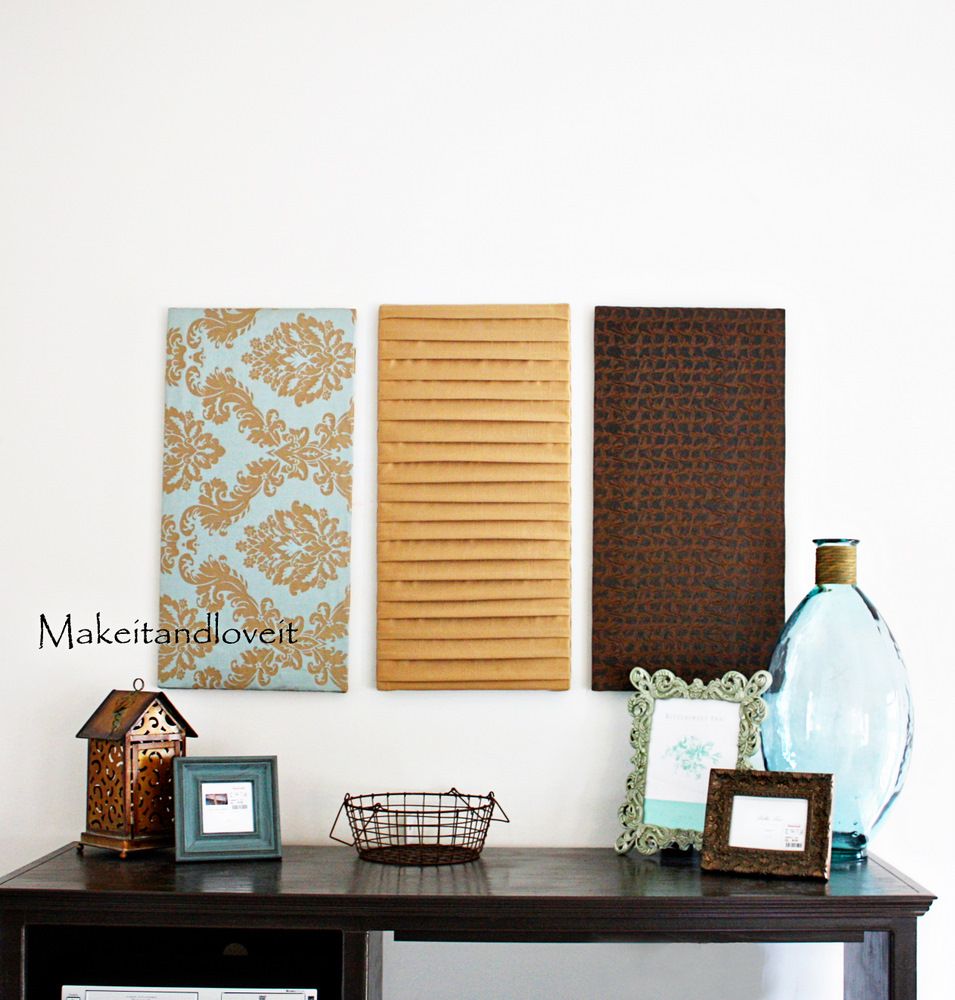
We have a big space above our entertainment center.
And a fairly tall ceiling.
So I came up with a solution to fill up all of that plain 'ol wall.
(No paint allowed......oh, the life of a renter.)
(Ignore those empty picture frames......pictures are being printed.)
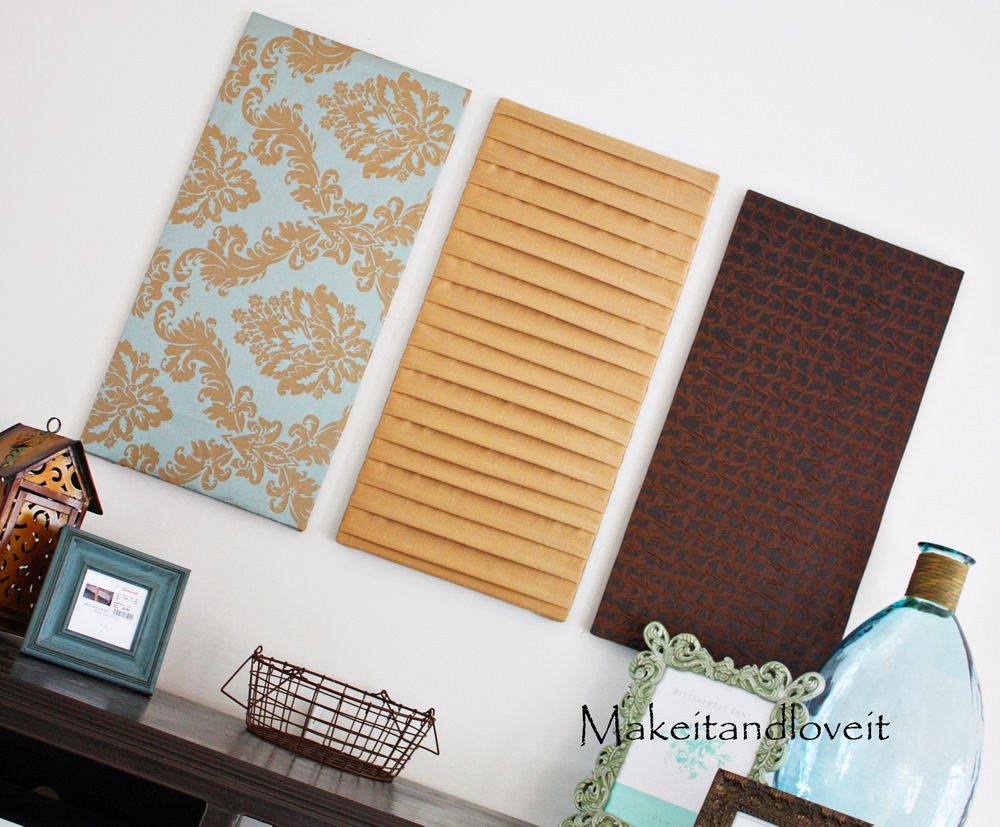
Do you remember when I made some wall hangings a while ago? Well I wanted some big ones for our front room. But a custom size, different than the art canvases available.....and a bit cheaper.
And I added a bit more texture this time around.....
Ah, just right for our space.
So I bought a piece of underlayment from Home Depot. I have no idea what it's intended for but it was $5 for a 4 x4 foot piece...........just perfect for my budget. (all of you carpenter minded folks......just keep the laughter minimal.) It's super thin and some sort of pressed wood. I cut three pieces that were 15 x 30 inches.

And did you know that there is a sale section at the hardware store? (I was at home Depot)
Yeah, just like a sale rack at the back of the clothing store. Man, I am a sucker for a good sale. (Especially at the clothing store, but we can talk about that later....)
And once I saw those markdown signs of $0.50, $1.00, and $2.00, I dove right in.
That's where I found some scrap wood to make the frame for the wall hangings.
Gosh, I guess the pieces of wood are about 1 x 2 inches. They weren't the full lengths and must have been used for other things and then the scraps were thrown into the sale bin. (So save your change and go on and check out your nearest hardware store.)
So I cut my pieces of wood to fit within the size of the large piece of underlayment. The 2 long pieces were 30 inches long and the 2 end pieces were 11 inches long.

Then I used a staple gun to attach them at the corners..... (you can use nails and make diagonal corners and such......but this is a quicker and perfectly stable solution. They don't hold much weight at all.)

And then stapled the underlayment piece right to the wood frame.

Then I cut a piece of material slightly bigger than my form, making sure to have enough excess fabric to fold around the back. Pull fairly tight and staple in place.....

And fold the corners over nice and snug.....

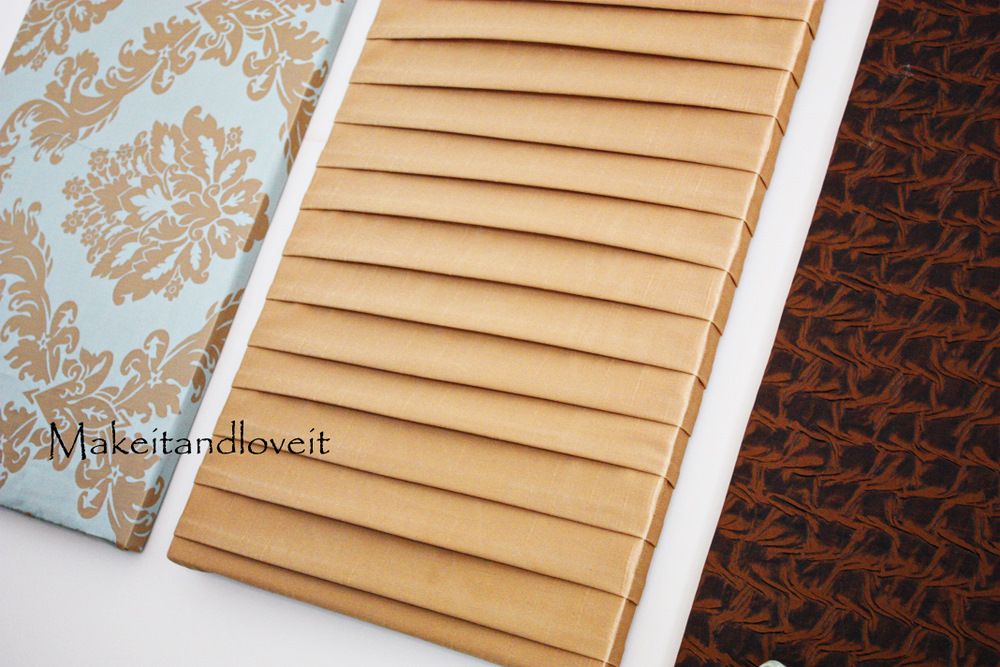
For the center gold wall hanging.........I made folds in my piece of fabric and pinned and ironed as I folded.

They weren't huge folds, just enough to tuck the fabric underneath.

The fabric I used was sort of satin-y so the folds didn't stay ironed perfectly well. (If using a lightweight cotton, you shouldn't have the problem I did.) So I sewed the folds in place at the sides and kept the center pinned.......

And then staple the fabric (with the pins still going down the center) to the wooden form, making sure to pull the edges tight, securing the folds in place. (Start on one of the sides and staple along the entire side. Then pull as you are stapling the other side. Then staple the shorter ends.........but don't pull to hard on the ends, or you will pull on the folds a bit.) Then take the pins out.

Pound in some nails and hang up your new focal point to the room.

No comments:
Post a Comment